Blade & Bastard (or how Wizardry 1 kicked my ass)

I’ve been reading two new mangas, published recently, both interesting and heavy on dungeon-delving but very different in style: Tower Dungeon and Blade & Bastard. Tower Dungeon is the more interesting of the two in my opinion and I’ll probably talk about it soon enough, but today I’m gonna talk about the other one, or more precisely I’m gonna talk mostly about the inspiration source of Blade & Bastard – the original video game Wizardry that started it all.

Note the Wizardry trademark on the bottom right of the book, it’s not simply wizardry-inspired like so many other stuff out there, it IS wizardry in manga form.

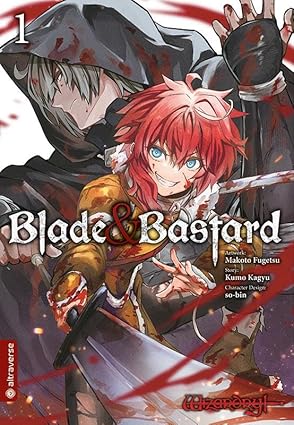
What intrigued the most in Blade & Bastard is one of its main theme that the main protagonist explains to a rookie adventurer- you can die in the Dungeon – in fact, there’s a really good chance it will happen sooner or later if you keep at it – but other adventurers may find you, bring your corpse to the Temple of Cant and you can be resurrected (paying the Dime of course) and be back to adventuring. There’s also a pretty high chance that the resurrection magic doesn’t work, in that case, it it most certainly God’s will, or so the priestess says, deeming you worthy of an afterlife instead of sending you back to your adventuring life. NO REFUND. Or maybe the ritual has been botched… Who can tell?

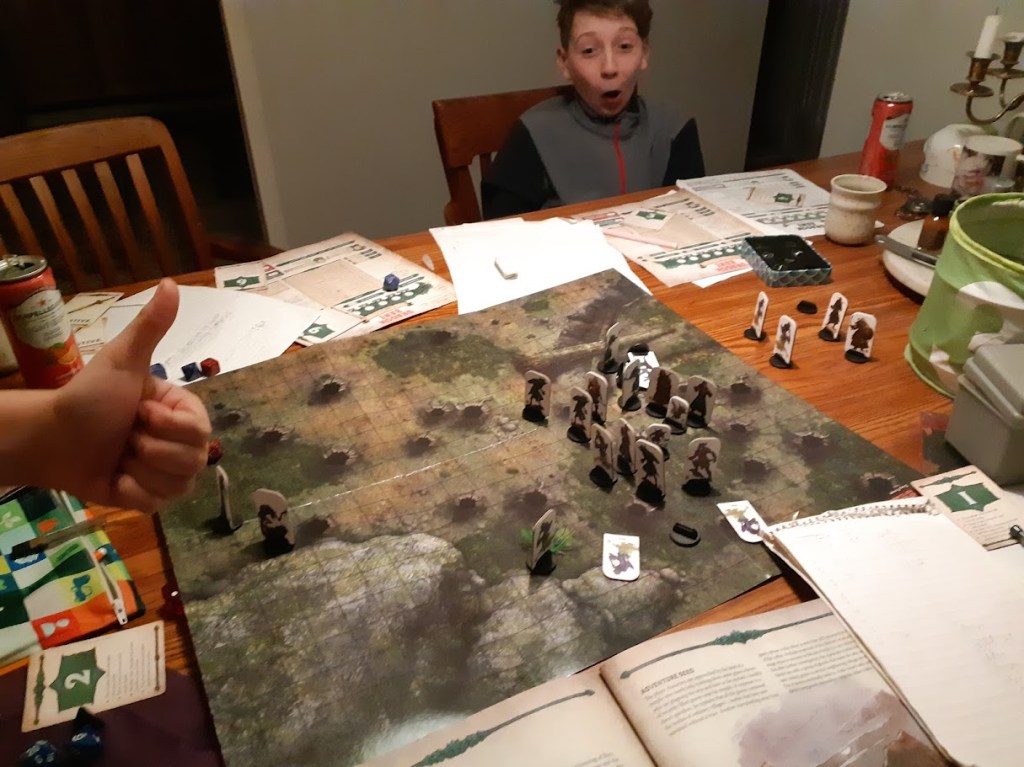
So one thing leading to another, in a full on autistic endeavor, I’ve decided to try the steam’s re-mastered version of the first Wizardry video game, with all the « retro » options on. If I’m to believe the game’s blurb the only difference with the original (apart from vastly improved graphics, music and sound effects) is some corrected bugs that afflicted the original, the gameplay and content is essentially the same.

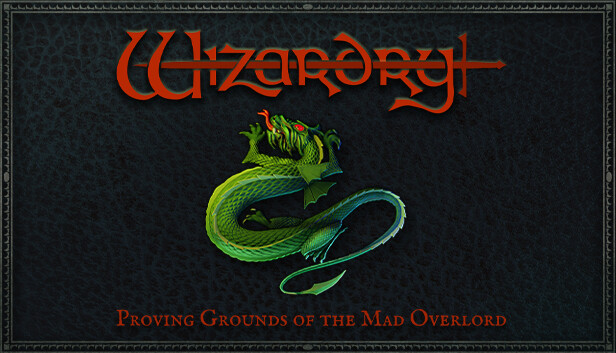
https://store.steampowered.com/app/2518960/Wizardry_Proving_Grounds_of_the_Mad_Overlord/

Summary of my game thus far:

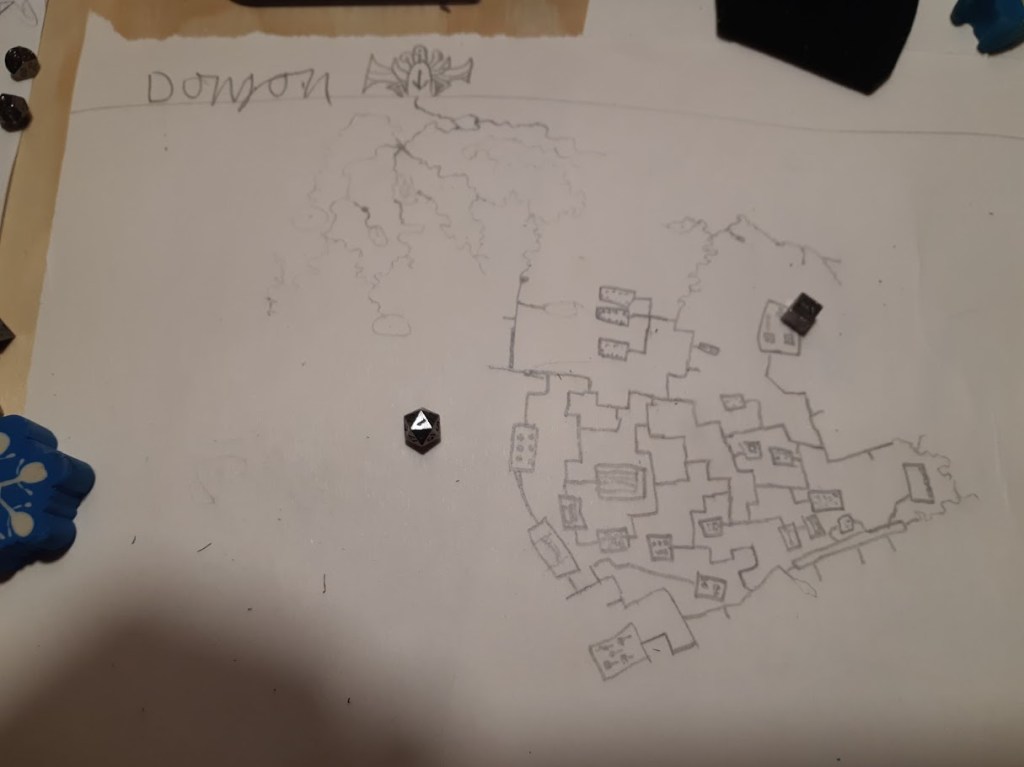
  • After losing several characters in the Proving Grounds’ Level 1 (they clearly didn’t make the cut!), I finally managed to have a half-decent party of level 3-4 characters and explored a big chunk of Level 1 and 2.
  • There’s several monsters in Level 2 that do POISONED, a real pain in the ass, each time I have to rush back in town to lose the effect as I’ve no easy way to counter it otherwise.
  • My party also encountered Rotting Corpses that do PARALYSIS, and 3 of my 6 characters were affected, including my priest that could have removed it with his newly-acquired DIALKO spell. Back in town, I see that I can pay the Temple to remove the effect but I don’t have enough money.
  • I recruit a bunch of new guys, level them up a while putting them with the 3 non-paralysed characters, lose some of them, get back two of my paralysed ones in time and then I find an elevator in a darkness-shrouded area of Level 1 while bumping in the dark.
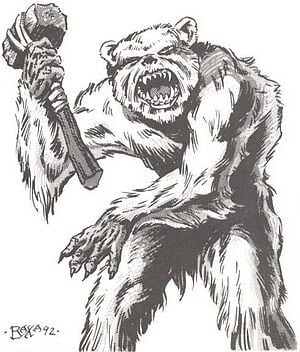
  • I try the elevator, can’t really do much in Level 2 with it so I go to Level 3 for the first time, just a quick look I said to myself and then the game throws one of its NUMEROUS CURVEBALL at me: the door I just opened is no longer accessible from the other side – I’m stuck in unkown territory… That’s really bad. I defeat a bunch of « level 3 priests » and then encounter six coyotes (of all things) that wipe the floor with my party. All DEAD.
  • I still have one level 5 guy that I had left in town, Bragg the dwarf fighter, and I recruit another bunch of level 1s, enough in fact to build up two parties as I now want a back-up party at all time.
  • After much grinding to level up the two parties, I begin the exploration of Level 3 but from the stairs now. I find out the hard way that Level 3 has several undetectable pit traps and I lose another entire party.
  • Now, I go more cautiously around with my surviving no-longer-back-up party, my priest’s spell LUMILWA helps a lot as I can detect secret doors and evade the pit traps that way. My gnome priest now has LATUMOFIS to remove poison, so that’s no longer the big annoyance it was. And she can also casts MAPORFIC, a very useful spell that lowers (that’s good) everyone’s armor class for the entire delve.
  • Anyway, I manage to reach the spot where my last party was TPKed, there’s a message on the bottom of my screen « characters are present in this area » or something like that. I can take my dead companions with me! But wait, I can never have more than six characters at a time in my party for some reason, I have to leave some of my living ones behind (they will wait there) but I still need to have the strength to cross Level 3 and get back in town…
  • So I go with 4 living characters and bring 2 corpses back at a time, a real chore I tell you. Some I resurrect at the Temple sucessfully, some turn to ashes and are now too expensive to be worth resurrecting, some I just take their equipement (I have some +1 armors by now) and leave them be. Sorry, but I need the money.
  • That done, I level my guys up some more in Level 3 and start to explore Level 4, both by way of the elevator and by the stairs.
  • My A Team has now in the front row: a level 5 human Lord (when he changed class he dropped back to level 1, his stats dropped significantly but he kept his hp), a level 7 elf samourai (a fighter with low-level mage spells), a level 8 gnome priest (got up to 9 but was drained a level by a Shade), in the back row: a level 7 gnome bishop (mix of mage and priest spells, can also Turn undead), a level 9 halfling thief (almost useless in fights but necessary for disarming traps on chests) and a level 9 elf mage (the most useful character for big fights, her spells are devastating, but she has only 22 hp).
  • I’m pretty confident by now, I’ve just killed two Gas Dragons (okay I thought I was doomed in that fight but they weren’t that fearsome at all). I found the stairs to Level 5 but I’m finishing Level 4 before I go further down.
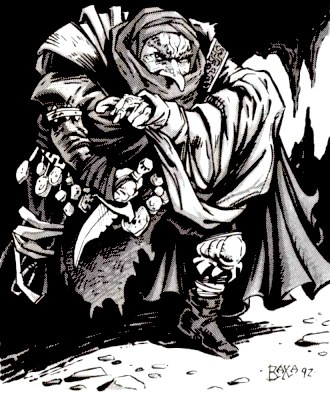
  • And then I open a door to an unexplored area (just got the gold key to open it) and immediately (programmed I suppose) get into an encounter with: a Masked Man, 2 Priests, 2 Robed Men, 2 Armored Men. Competing adventurers? I have no idea, this game doesn’t offer this kind of information. Now, the « Robed Men » are obviously mages and I think they are priority targets. I select my actions for this round, my mage’ll do a LAHALITO (level 4 spell, 6-36 dmg on everyone of a row) on the mages, attack them with my fighters too and my priests will soften up the opposing Priests, my thief will hide as it’s the only thing he can do. The actions are completed, I’ve killed only one mage, the Priests are wounded and that’s it. On my side… The opposing mage had let off a MAHALITO (level 3, 4-24 on everyone of a row) on my front row, not too bad. But the Armored Men and Masked Man do massive damage, 40+ each, my Lord and Priest are DEAD. My Samourai is at half hit points. UTTERLY RIDICULOUS. I get it now, another curveball. This is a serious, serious fight. I select MADALTO (level 5, 8-64 dmg on row) with my mage on the Armored Men, my bishop will try a MANIFO on the Masked Man to try to paralyze him (this spell rarely works but I have to try something), my Samourai and Thief will attack the Mage, hopefully they’ll finish him off before he acts. The second round’s results: the mage foe dies, that’s great. My bishop’s spell fails. My samourai is slain by an Armored Man. My mage is too slow to act and is killed by a single sword swing as she’s no longer back rank. My two surviving characters are my worst in a fight, my bishop and thief. They try to flee next round, they fail, they die. I’m back to grinding if I want to continue.
  • An absolute beating… My soul is crushed. I have still some characters in town, Bragg the dwarf fighter, now level 9, is still alive somehow and I could assemble another decent team if I wish. But I have enough of the game for now.

I still enjoyed a lot the game, the playful nature of the dungeon’s levels, the joy of discovering secrets, of understanding what has to be done in order to survive, of gaining new spells that offers a new quality of life suddenly, etc. Apparently I was underlevelled for this big fight too. And my whole team had some bad rng for hit points gains except my priest I think, with my front rank not that great for tanking hits. But all that said, it’s gonna take a while before I play this game again, the grind needed to win it is painful and my leisure time is limited. But you have to respect Wizardy: proving grounds of the mad overlord, both for the challenge it offers and its legacy. A legacy particularly important in Japan due to some twist of fate, where it inspired a multitude of sequels and spin-offs.

And that leads us back to the Blade & Bastard manga wherein we can see all of the wizardry’s quirky gameplay on display but with the narrative format that allows to explore its universe from other angles, as with the aforementionned resurrection in the Temple of Cant. As a player of the video game I had some incentive toresurrect some of my characters, but only if it meant keeping a good character instead of the grind of building another one from the ground. In an immersive story it can mean much more obviously, getting back your fellow adventurers, long time friends and such.

Gunderholfen – Hot & Steamy (session 17)

Hey, what do you mean my title made you expect something else? HOT. STEAMY. I mean, basic vocabulary…

Short session, 2,5 hours.

Gunderholfen by G. Hawkinshttps://www.drivethrurpg.com/en/product/265629/gunderholfen

Player Characters (PCs) – The Battle Brothers:

  • Aracyne, Elf Hunter, fearless Guild Leader, (Isaac)
  • Jedri, Ratman Thief, he likes his rat-shape curse (Isaac)
  • Grimoire, Goblin Mage, frail but smart (Isaac)
  • Forka, Dogman Knight, fierce warrior (Edmond)
  • Torch, Goblin Knight, not expendable anymore (Edmond)

This session’s main goal: find the « dwarven city »

What the other adventuring guilds are doing at the moment:

  • Green Imps: adventuring but not in Gunderholfen
  • The Protectors: resting/recuperating in Longfelt, Bodil is concussed, Bodil and Efram have infected wounds
  • Black Axes: leaving for Gunderholfen soon
  • The Musers: leisure in Longfelt

Longfelt

  • The BB buy a lot of food rations, put them into a small barrel, with the idea of leaving it inside their newly-acquired Level 4 outpost.
  • While taking their breakfast at the Hare & Hound Inn they are visited by a gnome merchant (and magic-user) named Frinywyd who has an offer for them. He wants to open shop into the liberated Level 1 of Gunderholfen and asks for the BB if they would escort his caravan to get there and they gladly accept.

Ganfal Swamp

  • The crossing is slower than usual, leading the caravan on the treacherous road half-eaten by the swamp. Halfway through, one side of the cart slides into muddy waters and it takes great effort from the group to get it back on firm land. (Forca get disheartened in the process)
  • Fortunately they reach their destination without further hindrances.

Gunderholfen

  • The BB advise the gnome merchant to occupy the room of the late goblin chief in Level 1B and he does so. They also take a look at his wares and Aracyne buys an amulet of spell focus. They see that the gnome sells bottled elementals that can help in fights but the asked price is a bit too steep.
  • They then go down to Level 2, have to defend themselves from several hungry Stirges and then take the secret ladder to Level 3. From there they cross the dead kiigoths’ territory and go down (very cautiously) the slippery stairs to Level 4.
  • They find their outpost undisturbed, door still staked, and they leave their rations inside. They write a quick message on the door: « The Battle Brothers are here » with a cray and leave to explore.
  • They first go nearby, just south of their outpost, and entered a warm area with low visibility due to steam. They hear a high-pitched laughter and a loud PLOP and see, barely, a small winged creature flying above them – a steam mephit. Aracyne has time to shoot an arrow at it and manages to hit it despite the obscuring vapor. Forca is convinced that the nearby stalagmite is a creature and hits it with his hammer, breaking a chunk of it but with no further result.
  • The wounded mephit avenges himself by creating a rain of scalding water on everyone below. Torch protects himself with his shield but the other adventurers are wounded (fortunately I rolled very low on damage). Another mephit sends a jet of hot water at Jedri, who fails to evade and is wounded. But then the PCs act. Aracyne finishes the wounded mephit with another well-place arrow. Grimoire casts a fireball at the other, hurting it ligthly. He then casts Levitate on Forca who smash the mephit with an hammer blow and kills it. With no further threat, Grimoire casts Treat Wound on Jedri and then PCs search for treasure and it takes some time but they finally find some ancient dwarven coins (10 gp each) that were stashed on top of a stalagmite.
  • Thence they go back at the intersection and go south and soon get in another fight despite their attempt at stealth, this time against a juvenile ankheg. An arrow from Aracyne is deflected by the insectoid’s carapace and the creature try to hit Jedri with one leg but he evades. The ratman then counters with two powerful hits from his light flail and morningstar, wounding the ankheg. Next, Forca delivers a massive blow of his hammer, so powerful that it detaches the monster’s head from its body, killing it instantly. The close by lair lair of the ankheg is littered with bones but nothing else.
  • The PCs continue on the path that they’ve been told leads to the the dwarven city, going east and south generally, and after that west, inside a long and warm natural passage that debouche in a large, even warmer cavern. The air is dense with mist.
  • Forka the dogman, even with his helmet on, hears some kind of high-frequency sounds emanating from somewhere above and, through the mist, the PCs can see several glowing spots. They soon see what’s the meaning of all this when creatures plunge towards them: Flaming Bats!
  • 5 Flaming Bats (with some other « warming up » above) get near the PCs. Two of them belch clouds of black smoke, partially obscuring the adventurers’ vision. Another try to rake Aracyne but he dodges. Same with Jedri. Another let go of a jet of fire on Forka but his armor protects him. The adventurers make quick work of all but one bat, but 3 more are coming to the fight! One makes a fiery dive towards Jedri but he dodges. One comically latches on Forka without managing to hurt him in the least and the knight body slams the bat on the ground (brawling attack), crushing it under him. Meanwhile, Aracyne concentrates his shots on the bats flying too high and kill several. Jedri kills a bat but then he inadvertently throws his flail several yards away and also bends his morningstar (two mishaps in a row)! Grimoire casts Levitate on Forka and the latter smashes another bat midair. A bat bites Forka and this time, pierces the armor. Another one painfully burns Jedri with a fire jet. But before long there’s only two Flaming Bats remaining, still on the ceiling, that seem more interested in perpetuating the species than to fight.
  • Victorious in this big fight, the adventurers have a look at the passage to the south, a bit further peek at the gate of the dwarven city and call it a day, having numerous wounds and depleted willpower for almost every PCs (and some conditions) and return to their Level 4 base to rest.

Closing Comments:

  • Escorting the caravan meant increased chance of random encounters but none occured, only a DB ‘s journey mishap.
  • I did not really convert the steam mephit for DB but it worked fine nonetheless, with the first mephit summoning another and then trying to keep away from the PCs and attack at range.
  • Forka’s heavy armor is very handy in fights, no doubt about that, but that makes sneaking for the group virtually impossible (they could still split and scout ahead). I like how it balances overall.
  • The fight with Flaming Bats was finished within 6 rounds, a pretty big fight and really fun I’d say. I made it easier because I ruled that 1d6-1 bats joined the fight each round, so not the whole14 bats of the room all at once. But it was challenging and the PCs had to spend a lot of ressources to win so I think it was good.

Next session

Shout-out to DF Whiterock: the gold standard of play reports

Just a quick shout-out to dripton from DF Whiterock as he consistently offers the best rpg play reports out there on his blog, in a category of his own really. Way better than what I’m doing over here I must say, my dear readers. He includes an impressive level of details for one, and never to the detriment of entertainment – not an easy feat to accomplish when writing play reports.

His present endeavor is a campaign of Dungeon Fantasy (a GURPS variant), he’s indeed a DF guy – within the Halls of Arden Vul mega dungeon (which as a bonus I’m also a big fan of).

So, what can I add? The best play reports ever, precise and humorous. Also, a lot of behind the curtain to be appreciated by dungeon masters or would-be dms.

Highly recommended!

Gunderholfen- Peril in Ganfal Swamp (session 16)

I’ll try to have something like a weekly session, at least bi-monthly, of this campaign with my kids for the coming months until summer, we’ll see if I manage to do it.

Short session, 2 hours.

Gunderholfen by G. Hawkinshttps://www.drivethrurpg.com/en/product/265629/gunderholfen

Player Characters (PCs) – The Battle Brothers:

  • Aracyne, Elf Hunter, fearless Guild Leader, (Isaac)
  • Jedri, Ratman Thief, he likes his rat-shape curse (Isaac)
  • Forka, Dogman Knight, fierce warrior (Edmond)
  • Torch, Goblin Knight, not expendable anymore (Edmond)
  • Grimoire, Goblin Mage, frail but smart (me)

Gunderholfen

  • We start in Level 4, with the Battle Brothers and Protectors in the ogres’ den. Having slaughtered most of the adult males and ordered the survivors away, the adventurers clean up the place, using the open pit to good effect, to make it, well, less of an ogres’ den.
  • After that, they block the door and camp there for the night. Forka, in his turn to keep watch, hear footsteps nearby and whispering voices. There’s the smell of orcs. But they seem to turn back the way they came.
  • Next day they begin together their ascent towards sunlight. They tie themselves together with rope for the slippery stairs to Level 3. Reaching Level 3, they do a small detour to see Grom the ogre and ask him some questions. They give him a 50 gp gem and learn from him of the quickest way to reach the « dwarven city » (going south of the ogre den in Level 4, then south-east and then west in a long, noticably warmer passage into a large carvern and then south to reach their destination).
  • They encounter a patrol of ant workers in Level 2 busy transporting dead giant rats and neither side is interested in fighting.
  • They reach Level 1C, into what was the hobgoblin area and got to a portcullis that was always closed to them in the past. They opened it and, a bit further, got to a deep vertical, artificial shaft with chains dangling but no easy way down.
  • They backtracked and then reached Level 1B and got out by the « goblins » door.

Ganfal Swamp

  • Aracyne leads the group competently through Ganfal Swamp and they make good progress despite the harassing environment but then, several hours in, they see a dozen or more humanoids in ragged clothes emerging from behind an outcrop: ghouls!
  • The adventurers fire a salvo of spells and arrows on the howling undead and four of them are slain and another immobilized by a spell of ensnaring roots. But the ghouls are now in melee. Bodil gets hurt by a claw attack and then tackled to the ground and is in great danger. Efram the Mage gets vomited on by a ghoul and then flees not long after, demoralized by the terrifying howling. Aracyne is dishearthened but stands his ground.
  • Two more ghouls are on the approach. Bodil the elf is badly hurt and unconscious. The Hunter Adalbert also flees after another howling near him. Two ghouls are avidly pursuing Efram and Adalbert. Bayard smashes a ghoul’s face in with his magic mace and it’s killed. Jedri drops his flail inadvertently but has a dagger to continue fighting two-weapons style. Grimoire the goblin Mage casts 3 small fireballs and efficiently finish 3 already wounded ghouls. Forka team up with spear-wielding Torch to slay another. The mage Delevan cast Levitate on the ghoul on top of Bodil and throws it away, hurting it in the process, then he goes to help his fleeing companions.
  • Twelve ghouls have been slaughtered, two surviving start to run away, one is stuck in place by Ensnaring roots and is finished by a big hammer blow delivered by Forka. The adventurers have won, with one casualty among them: Bodil is concussed and has infected wounds. Adalbert and Efram also have infected wounds. Fortunately they soon get out of the swamp, into the farmlands, talk to some peasants on the road and reach the city of Longfelt.
  • The two adventuring guilds make a vow of friendship, decide to leave each other signs (cray writings) in the dungeon if they go separately and then say farewell to each other.

Closing Comments:

  • Grom has gotten back his leadership of the ogres thanks to them, there’s that, but he thinks of the adventurers as dangerous and untrustworty and won’t be a true ally. Giving information in exchange for money to the PCs so they go explore a dangerous area is the most he’s ready to do in my mind.
  • The Level 1 mining shaft isn’t there in the book (it replaces an exit to open air), I added it for some unscrutable reason…
  • Rolled an encounter in the swamp and was tempted to just pick an appropriate monster in the Dragonbane Bestiary but instead I’ve rolled on the d20 table and got 20, ghouls.
  • Ghouls in dragonbane don’t have any paralysis abilities as the D&D ones but, as monsters, have a d6 table to roll on to determine what they do, and also, as monsters, they always hit (it’s up to the target to try to defend if they wish). I rolled for each ghoul separately and it went smoothly enough.

Next session

Gunderholfen – Bullying the Ogres (session 15)

First session of Dragonbane/Gunderholfen since september of last year. Shame on me.

Last session the Battle Brothers had persuaded Bayard and his Protectors to make a temporary alliance and fight together against the denizens of Level 4.

Short session, 2 hours.

Gunderholfen by G. Hawkinshttps://www.drivethrurpg.com/en/product/265629/gunderholfen

Player Characters (PCs) – The Battle Brothers:

  • Aracyne, Elf Hunter, fearless Guild Leader, (Isaac)
  • Jedri, Ratman Thief, he likes his rat-shape curse (Isaac)
  • Forka, Dogman Knight, fierce warrior (Edmond)
  • Torch, Goblin Knight, not expendable anymore (Edmond)
  • Grimoire, Goblin Mage, frail but smart (me)

Level 4

  • The two adventuring guilds, ten strong, descend the long slippery stairs down to Level 4, taking their time to decrease the risk of falling. They also devise a plan to fight the ogres which they already know reside very near the entrance of Level 4.
  • Upon arrival they go east and get to the door leading to the ogres’ den. First trying a quiet approach, they try to open the open door silently but it’s blocked from the other side. Letting go of subtlety, Bayard and Forka, the two strongest characters push the door open, displacing a large rock and a wooden beam, the latter falling to the floor with a loud bam. The PCs hear ogres nearby shouting to each other and get ready for a fight.
  • Getting back quickly to the first room, the adventurers get in formation, with 4 of them frontline and mages and archers (and Torch) behind. The first two ogres in are not very efficient (one good hit to heavily-armored Forka) and are assaulted by weapons and magic and are killed just like that. The following ogre is a bit more successful as he rushes in and rams into Bodil the Elf, tossing him aside on the ground while another ogre misses Jedri the Ratman with a big swing of his club. Aracyne hurts the ramming ogre with two arrows to the chest, wounding him badly and Jedri manages to finish him with a deadly two-weapons combo. Efram, one of the Protectors’ mage uses magic to make one ogre fall asleep and now there’s only one left from the five that were coming at them. The last one still has the will to fight though and wounds Bayard with a big hit but get overhwhelm quickly after.
  • They hear a door slam somewhere close but no other ogres are coming for the moment so the mages have time to do healing magic and everyone is healthy anew.
  • There’s three corridors, with the one in front being were the 5 ogres got out. There’s nothing interesting northeast, they go south and walk close to the wall to get past a (non-hidden) pit trap.
  • They see a room full of refuse, inspect a storeroom (nothing but food & water) and then get in front of double doors, there’s a faint odor of woodfire smoke (along with strong body odours and other unpleasantness).
  • The adventurers bash the doors open and see a big room, something like a cooking area, two teenager ogres were ready for them and immediately kick the burning logs, spraying embers directly on Forka and Bayard. Neither of them were quick enough to evade and lose a round removing the painful embers. The two young ogres don’t stand a chance though and after one is killed the other surrenders and pleads for his life. Bodil would have killed him but Aracyne his in a merciful mood and spare hime in exhange of information. They thus learn of some of the closest areas in this part of the dungeon, not much, the young ogre says that their ex-leader, Gorm (from Level 3), knows a lot more more.
  • The adventurers then proceeded to round up the surviving ogres in the other rooms (in this self-contained area) consisting of: 2 adult male ogres, 5 adult females, the teenager and 2 other youngsters. Aracyne tells them to leave Level 4 and get to Gorm in Level 3 if he would take them. They agree to leave on the condition that they could take their stored food and water with them and the adventurers accept.

Closing Comments:

  • Not much exploration this session but a big step accomplished in removing the ogres, as their presence near the entrance of the Level was always going to be a problem each time they passed.
  • 10 adventurers together are certainly a force to be reckoned with. I’m thinking that they must attract more attention than a smaller group obviously and, at the very least, I will adjust encounter rolls to reflect so in the future. Otherwise, in a non gold-for-xp system there’s just no much disadvantage in being that numerous.

Next session

My son’s new dungeon (Dungeon of Kargen)

The Dungeon of Kargen, named after the fantasy city where it’s located, is 10 yo Edmond’s new homebrewed adventure location, with his brother as the unique player. I will try to highlight what happened so far with what they told me.

This is done within a 100% DIY system by the Dungeon Master in which there’s only 4 « attributes »: ranged attack, melee attack, magic attack and Defense. Starting numbers are rolled with a d20 for the main character or d20-6 (min 1) for hirelings (yes many hirelings have pretty abysmal stats…). There’s no cap on levels for characters, each level gives 3 points of attritubes to assign and 5 hit points. Melee damage is linked to attribute bonus but ranged attack bonus is only to hit and not for damage. Magic does more damage but depletes and must be purchased (a new wand). For the moment, magic is just another way of attacking and there’s no utilitarian or any other kind of spells (but that could change I was told).

The main character can bring along a maximum of 3 hirelings, or 5 when he reaches level 10 (and presumably more when of higher level). Also, a nice gameplay rule is that after 5 successful combats in the same area, it is considered « safe » (no more spawning) with the condition that at least one hireling is left in a strategic spot.

Interesting to note I think is what Edmond feels he needs to run his adventure: a list of shops and the items they sell and prices, two pages of hirelings and their stats, a chart of xp needed to advance in levels, a list of weapons and armors and their stats, a chart of bonuses associated with attributes numbers and that’s about it. Everything else he seems to create on the go.

The adventure so far:

  • The adventurer Jean-Paul, an archer, enters the newly-accessible dungeon of Kargen for his first foray and explored the Caves of Riches.
  • He defeats several squeletons and zombies but later on, he almost get killed by a mimic that was near a corpse holding a key in his hand.
  • Back in town he hires Petit Jean (a mediocre fighter) and Rolex (a capable but fast-exhausting magic-user) with the money from the treasures he found.
  • Next foray, the team reaches the City of the Imps. Most imps are non-hostile, they can control monsters to do their bidding and those are sometimes loose and dangerous.
  • They reach the Armory where they have to fight Living Armors.
  • Further on, they spot a throne chamber with a Lich and decide to give it a wide berth.
  • Back in town, he hires Georges (capable archer).
  • Next foray, they find the Area of the Lost Ones. Inhabiting the place are knife-throwing zombies that are fond of torturing people.
  • Back in town, he hires Gengis Khan (average fighter).
  • They find the Prison where a Dragon Skeleton is roaming. There’s many prisoners, all in separate cells. Frees and hires Robert (great fighter) from a cell.
  • They find the Maze and hear the mighty roars of The Minotaur. Find and open a secret door and gets face to face with the Minotaur, who’s in fact the Level’s Boss. They flee for their lives.
  • Gets in a very prolonged fight against 12 Living Armors and a Mimic in which the adventurers get the worst of it and flee.
  • After a stop in town, the team gets back to one of the first area into an unexplored and very long tunnel that leads to a section dubbed the « Mixtature« , inhabited by orcs, zombies, ogres and many other monsters.
  • Find 14 sarcophagi but already looted. Find a large fireplace and get into a fight with a fire elemental. The chimney leads to somewhere else but is haunted by ghosts.
  • Get into a treasure room with a strange statue with one arm extended in front of it, hand open as if waiting to receive something.
  • See a big fight between 3 parties of adventurers (11 total) and 40 orcs, join the fray and help kill the orcs.
  • This is all been happening on the fist Level of the dungeon.
  • TBC…

Gunderholfen – Meeting Bayard the Bold and his guild (session 14)

Battered from their last expedition, the Battle Brothers are back in town to recuperate and do some training afterward – before going back to the dungeon. They bring their new member, another goblin named Grimoire, a friend of Torch that can do magic.

Gunderholfen by G. Hawkinshttps://www.drivethrurpg.com/en/product/265629/gunderholfen

Player Characters (PCs) – The Battle Brothers:

  • Aracyne, Elf Hunter, fearless Guild Leader, (Isaac)
  • Jedri, Ratman Thief, he likes his rat-shape curse (Isaac)
  • Forka, Dogman Knight, fierce warrior (Edmond)
  • Torch, Goblin Knight, not expendable anymore (Edmond)
  • Grimoire, Goblin Mage, frail but smart (me)

Longfelt

Rumor

-There’s a monstrous rat disguised as a person going by night in the thieves’ quarter – hey (pointing at Jedri) wait a minute, y-y you’re a rat!

  • Hearing of this « disguised monstrous rat » they immediately think of their friend Tlali and they go see her at her house. There’s a nice reunion, she explains that she started the process to get back her human form but there’s powerful magic involved (Sethid’s, the Master of the Dungeon) and it will take a while.
  • They do some training and are living at the Hare & the Hound inn for the moment.
  • They buy some supplies, Forka buys a great helm and then, after 9 days in town, are ready to go dungeon-delving once more.

Gunderholfen

  • Travel through the Ganfal swamp is uneventful.
  • They enter the dungeon and when they approach Level 1C they start to see a trail of dead hobgoblins – all missing their ears. The corpses are fresh – recently killed for sure.
  • Forka pick up the scent of non-hobgoblins and tries to track where it goes – more dead hobgoblins on the other side of the (cut) rope bridge that leads to the exit of Level 1. They spend some time reparing the bridge and continue their tracking down in Level 2 and then it goes south and west in an area the PCs already explored (and had a bad time against both zombies and giant ants).
  • They’re near the giant ants’ nest, the insects are clearly agitated. The PCs quickly cross the area and further south, they hear some voices coming from the room with the aforementionned zombies.
  • The Battles Brothers decide to go back the room with broken crates and wait there for the other guild to come their way (there’s no other path). They soon hear the sounds of a battle between adventurers and giant ants though.
  • It seems like the other guild is retreating in order, with a rearguard fighting in the narrow tunnel. The Battle Brothers see an elf, with short sword and buckler in hand, emerging from the tunnel. The latter is surprised and maybe a bit alarmed but then he asks for their help against the giant ants – they’re coming in great numbers.
  • Aracyne hesitates an instant on what his best for his guild (even contemplating murder!) but then he decides to help the other adventurers IF they accept to give his guild some money… The two elves quickly negociate and settle for 80gp to be given after this fight. The other members of the rival guild come into the room one by one, two mages, a hunter and the last being Bayard the Bold, their leader, brandishing a glowing mace and his plate armor covered in insect juices – an impressive sight! His companion informs him that the Battle Brothers will help the Protectors and already the first giant ants enter the room.
  • The ensuing battle is intense, with the fighters type holding the line, at least at first, against both normal worker giant ants and bigger, meaner soldier giant ants. Another wave of monsters arrives though and some get past the frontline and one mage of the Protectors get nearly bitten in half by a soldier ant. The other mage hurries to keep him alive with healing magic. Forka makes good work of his two-hand hammer, delivering massive blows left and right. Aracyne and his hunter counterpart shoot arrow after arrow on the incoming ants. Grimoire, their new goblin mage, proves to be a good addition and incinerates ants with fireballs. Two dozens dead ants are littering the floor and the two guilds seize the opportunity to move away from there, going east and south, with the Battle Brothers knowing their way around, and soon getting behind a door where the ants horde won’t reach them.
  • Now in safety, the Elf from the Protectors (their treasurer named Bodil) counts 80 gold coins and gives them to Aracyne with Bayard frowning at the sight but not saying anything. The two guild leaders then exchange a few compliments, talk about their recent delves and then Aracyne has this idea, he offers to the Protectors to do a joint expedition into Level 4. Bayard, not one to decline a challenge less his reputation for bravery takes a hit, doesn’t think much and accepts.

Closing comments:

  • I had decided when I started this campaign that I would put some emphasis on adventuring guilds interactions. I have written some random tables, erased them, re-written some more, to help me get a sense of what NPCs guilds would likely achieve as competing explorers (the PCs still having a decent headstart, of course it’s still about them). I’m not quite satisfied with this tool yet but it did indeed lead to this, I think, interesting session.
  • Now, dealing with so many NPCs, adventurers with all their abilities to boot, is certainly cumbersome for me as a the DM. In fact, I’m pretty certain it’s the reason why in most campaigns rival adventurers don’t seem to accomplish anything ever and are reduced to discreet appearances here and there.
  • Isaac’s first instinct was to ambush the Protectors while they were fighting the giant ants. A sound plan strategically speaking. Also quite ruthless. I let him choose his course of action but I’m happy in the end he chose to help (with a price attached) instead of killing.

Next session

Gunderholfen – Into the Darkness (session 12)

With the kiigoths dead, the entrance to Level 4 is freed. However, the PCs will get to discover that Level 4 is not so easily conquered…

Gunderholfen by G. Hawkinshttps://www.drivethrurpg.com/en/product/265629/gunderholfen

Player Characters (PCs) – The Battle Brothers:

  • Aracyne, Elf Hunter, Guild Leader, (Isaac)
  • Jedri, Ratman Thief (Isaac)
  • Forka, Dogman Knight (Edmond)
  • Torch, Goblin Torchbearer (Edmond)
  • Ghardeet, hired Hobgoblin Mage/Shaman (me)

Level 4

  • The Battle Brothers (their official guild name now) go down the long slippery stairs to Level 4A.
  • They get into a rectangular room, there’s a stuck door east, with deep ogre voices coming from the other side.
  • The PCs go south down a slope and into a natural passage. They look into a small cavern on their right and find several dead orcs, hard to tell what they died from.
  • They go south and ascend a little now and come in front of a 10′ wide chasm barring their way. They all jump over on the other side without any special precautions.
  • They’re inside a large cavern and further south into a smaller one with no exits and suddenly their torchlight diminish to only the faintest of glow. From the darkness a small, stunted-built humanoid comes at them with a wicked dagger but Jedri the ratman reacts quickly and stab him first, with both his daggers, the Dark Creeper dies and his body releases a dazzling flash of light.
  • Inspecting the room further Forka feels a slight draft of air from the southern part of the cavern and the party soon discover a secret door (that lead to Level 4C).
  • They follow a long, sinuous passage and get into a small cavern where they’re immediately ambushed by 3 other Dark Creepers (their torchlight almost extincted again). One Dark Creeper place himself behind Torch and is going to slit his throat but Forka saves his underling by rushing to his help (Heroic Ability: guardian) and takes the hit instead (mostly blocked by his superior chainmail). Jedri gets stabbed and is hurt. Aracyne kills an opponent with a well-placed arrow but the ensuing burst of light dazzles Ghardeet. Forka kills another with a big blow of his two-hands hammer and Jedri kills the last one.
  • The PCs get a bit further and Aracyne spots two Dark Creepers standing on ledges on each side above the floor. He shoots and kills one. The other jumps and dash towards the PCs but he quickly meets his demise.
  • They then fail to spot a well-concealed trap and Torch falls into a spiked pit trap and is fatally wounded. Only magic can save him but Ghardeet doesn’t see any value in saving the still (for him) expendable goblin. He’s finally convinced with the gift of a wine jug. Torch is saved.
  • Thence, they get to the entrance to a large cavern but before they get in another Dark Creeper jumps on them from somewhere above. Jedri, the fast-footed thief, manage to evade the blade that targeted him and his own hit connects efficiently. A flash of light but everyone cover their eyes in time.
  • Other Dark Creepers come out from somewhere inside the large cavern. Aracyne kills one with a well-placed arrow. Ghardeet kills another with his magically-augmented staff.
  • With no immediate danger the PCs come across a hut furter into the cavern, search it but nothing much of interest.
  • There’s a rope bridge that goes over a large chasm and the PCs get across. On the other side they follow a reddish cobblestone patway that lead to another cavern with several huts. There isn’t anyone there but the adventurers do some good looting in coins, jewelry and semi-precious stones.
  • Further south the adventurers hear a piercing whsitle sound and then fight against 3 more Dark Creepers that they vanquish without much trouble.
  • There’s a guard hut nearby and a large palissade south-east with large double doors. The doors are slowly opening and large throng of Dark Creepers, dozens, emerge from the palissade.
  • The adventurers can’t hope to win against such numerous foes and flee the way they came. They have to be quick, any delay and they’ll get a blade between their shoulders. They manage to get across the rope bridge and they quickly cut it down from their side, this is met with nothing more than threatening whispers from the other side of the chasm.
  • The PCs get all the way back to the entrance of Level 4A.
  • They go north into a corridor and then west. They spot a skeleton (unmoving) inside a small room, adorned in chainmail and his skull crushed.
  • Next room they get assaulted by a monkeyish Screaming Devilkin that took surprisingly many blows to kill, and yes, screaming devilishly loud all the while. Troublesome situation.
  • TBC…

Closing Comments:

  • A series of fight that went really well and then a desperate flight. Things can change fast!
  • There’s a whole village of Dark Creepers and the book specifies that since it’s their home they try to kill the intruders instead of just stealing from them like they would do elsewhere in the dungeon.
  • I’ve changed a bit the effect of darkness, or at least the fluff, the way I describe it – the Dark Creepers aren’t casting the spell Darkness in my version, rather their bodies just absord light (and release it upon dying). I don’t know, not important but I prefer it this way, like it’s something of a quasi-natural biochemical effect. Furthermore I think a 5 or 10′ radius of faint light, a torch reduced to a candle let’s say, with shadowy figures dancing just outside, isn’t that much more reassuring than foes shrouded in darkness I would think.
  • But this time either the Dark Creepers missed their sneaking checks or the PCs succeeded their awareness checks (even with bane), surprise attacks just did not happened in any of the ambushes.
  • Good reaction from the boys to cut the bridge, twas the only way to survive I think.
  • Ended in hostile territory this time and lot happening in next session…

Next session

Gunderholfen – Against the Kiigoths (session 11)

There’s officialy 5 parties of adventurers (including the PCs) in our campaign that have been given permits to explore Gunderholfen. Being the first one in place gave the PCs a huge headstart, particularly with their alliance with the hobgoblins. But now comes a dilemna, do they help their allies against other adventurers and be complicit on such a dubious course of actions or do they let them fare for themselves onward to their incoming annihilation?

Gunderholfen by G. Hawkinshttps://www.drivethrurpg.com/en/product/265629/gunderholfen

Player Characters (PCs):

  • Aracyne, Elf Hunter, Guild Leader, (Isaac)
  • Jedri, Ratman Thief (Isaac)
  • Forka, Dogman Knight (Edmond)
  • Torch, Goblin Torchbearer (Edmond)
  • Ghardeet, hired Hobgoblin Mage/Shaman (me)

Longfelt – Gunderholfen Level 3

  • Leaving Longfelt and all went well with getting across the Ganfal Swamp.
  • In Gunderholfen, they talk to Nerulf who informs them that the Hobgoblins are taking heavy casualties againts adventurers, most recently against a party with 3 magic-users. This party has installed itself in Level 1A for the past few days and is still there. With current rate of losses, Nerulf will remove patrols outside of 1C except the nearest exit in 1B.
  • Unmoved by the hobgoblins plight, the PCs hire Gardheet, the hobgoblin mage (30gp and 10% cut) and go to Level 3, taking the shortcuts they know.
  • Down the ladder in Level 3 they go west where they hear sounds of grunting and growling and open a set of double-doors and come face-to-face against 7 kiigoths.
  • They kill a few quickly but as much as 15 others rush from the 2 adjacent rooms!
  • The PCs take a few steps back to get into the corridor behind them in order not to get immediately surrounded.
  • A long and violent brawl ensues. Kiigoths often keep fighting even when mortally wounded and get more ferocious while doing so. Jedri gets wounded by a club attack but Ghardeet casts stoneskin on him at maximum power and the protected thief is able to stay in the fight and, with one knife in each hand, stab foes left and right. Forka’s chainmail deflects most attacks from the crude weapons but is still getting bruised after getting hit by numerous blows. Aracyne shoots arrows from behind and Torch even manage to burn a couple of kiigoths here and there. With several of his own now dead the bigger, meaner kiigoth leader gets into melee against Forka and has one good hit with his deadly-looking, not-crude-at-all battle-axe but is smashed to pulp by the knight’s 2-h hammer in return. The death of their leader isn’t changing the savage kiigoth’s will to fight unfortunately and the adventurers eventually have to kill them to the last, not without being severely hurt themselves in the process.
  • The fight over, the PCs go to Jedri’s place nearby and Ghardeet heal all their wounds. They then get back to to the big pile of dead kiigoths, but there’s not much else other than the very nice battle-axe (nobody is very proficient with axes though).
  • They then go at the big room south and find big non-locked chests that contain coins, a nice chainmail (taken and wore by Forka) and a big, sturdy dwarven shield (given to the less and less expendable Torch, who’s overjoyed by the gift).
  • Going to the west now, they find a lot of broken, useless stuff and also an intact clay jug of wine. A bit further they also find an okay helmet (to Jedri).
  • They get into a very long and narrow passage going south, there’s also a side-passage going west with a brirge going over fast water. There’s a really bad smell coming from that way though and they decide to go further south instead.
  • They open a door into a room with a statue of a dwarven warrior. They spot a depression on his extended hande but can’t do much with anything and right then, an ooze drops from the ceiling on Forka’s head! Torch burns the ooze a few times with his torch and saves his boss from asphixy. Forka looks at the ceiling fearfully for a while.,
  • Nearby, they see a Sun Face carved into a wall and messing with it, manage to obtain a ruby from its opened mouth. It’s exactly the rigth size for the depression on the statue’s hand and they put it in place. An aura of virile dwarven energy surrounds them and they all feel a bit more competent. Except the elf, virile dwarven energy isn’t for elves obviously.
  • Next room, looking for it, they spot an ooze suspended on the ceiling and they send Torch with his shield up to bait it to drop down, which it does but it somehow slides on the shiels and target Torch’s head and it’s the turn of Forka in coming to the help of his sidekick.
  • The PCs now have found their way to the Level 2 stairs coming from the other way around and connecting their map in the process. They decide to go to the lair of ogres in the central corridor but the door is stuck and that’s enough to dissuade them for the moment.
  • They get back into the long passage west and Jedri, who’s walking a few steps ahead, sees an ogre coming the other way. He’s dragging a kiigoth corpse along.
  • Aracyne tries to cast Augment Weapon on his bow but only gets a nosebleed for his effort. He shoots nonetheless and hurts the ogre. The latter try to bum-rush the elf archer but Forka valiantly gets in front (guardian) and takes the hit instead. He gets slammed hard against the wall but still manages to take a big swing of his hammer at his foe. Jedri then plunges his dagger in the ogre’s chest and gets the kill.
  • Leaving the dead ogre behind but picking up the dead kiigoth, the party goes back to the ogre lair and boldly shouts at the inhabitants that they want to make a deal. Or more of a fait-accompli, since they killed the kiigoths, the enemies of the ogres, they ask that they show them the way to Level 4. The ogres (there seem to be 3 of them) are surprisingly amiable (excellent persuade and reaction roll) to this non-deal and Glorm, their leader escort them to the stairs to Level 4. He also tells the adventurers that there’s an ogre colony in Level 4 (not in good terms with himself) and also an orc colony.

Closing Comments:

  • The players chose to explore and let the hobgoblins fight alone, that’s probably the thing to do. I’ve built an okayish random table to see how goes the protracted fight between the hobgoblins and adventurers and let the dice decide, mostly.
  • Big fight against the kiigoths, close one too. Forgot one major thing on my side though, the squares on the map are 10′ wide, so that was a 20′ wide corridor not a 10′ one like I had in mind. Fighting there wouldn’t do much to prevent encirclement in fact. Bad DM, bad!
  • The ogres of Level 3 were amiable at that moment but will find their dead kin before long. With an arrow protruding from his chest, even an ogre will make the link…
  • They found the entrance to Level 4! The last of the Upper Levels and more complex than what they’ve seen so far, no doubt about that.

Next session

Gunderholfen – Back in Longfelt (session 10)

Short session without any combats but in which the PCs managed to get out of the dungeon efficiently (after 3 sessions inside) with the help of their new friends.

1,5 hours

Gunderholfen by G. Hawkinshttps://www.drivethrurpg.com/en/product/265629/gunderholfen

Player Characters (PCs):

  • Aracyne (Isaac), Elf Hunter, Guild Leader
  • Forka (Edmond), Dogman Knight
  • Torch, Goblin Torchbearer (Edmond)
  • Ghardeet (me) Hobgoblin Mage/Shaman
  • Tiali, Ratwoman Thief (me)
  • Jedri, Ratman Thief (me)

Level 3

  • We start in Level 3 in a set of rooms occupied by Tiali and Jedri, cursed adventurers turned into rat persons. They shared a nice broth together and had time to rest and talk.
  • Among the things Tiali and Jedri shared is a shortcut to get to the entrance of Level 2. It’s near, to the north, next to the kiigoths’ den.
  • The PCs set for a plan of action, they would get out of the dungeon ao that Tiali could ask in town for a cure to her affliction. Jedri for his part, doesn’t mind being a rat person as it gives some good advantages as a thief and he never was a good-looking fellow anyway.
  • Getting out of the room, wary of the Gelatinous Cube in the vicinity, the PCs go north at the pair of double doors.
  • They get inside a large room that has a dead ogre and 3 dead kiigoths, casualties from the conflict going on between these two sides.
  • There’s a locked room at the left but the two thieves warn that there’s something dangerous inside.
  • Door to the right, there’s a small closet with a lone skull in a corner. Forka smashes it with his 2h hammer and kills a green centipede at the same time.
  • Going north they get into another large room with another dead ogre (no kiigoths this time) and a ladder next to the northern wall.
  • Forka goes first up the ladder followed by Torch (they named the goblin follower by what he does) and everybody else and up they go for a 100 feet until they reach a secret room right next the great hall, the entrance of Level 2!
  • From there they get among their hobgoblin allies and separate from Ghardeet and Torch until their next delve, maybe.
  • They get out under the sun, which they haven’t seen for several days, and start the trek through Ganfal Swamp. Aracyne the hunter manages to lead them well through the treacherous swamp and they reach the town of Longfelt before the end of the day. They leave Tiali to her own device but promise Jedri to invite him for the next delve.
  • Forka and Aracyne both takes training course in their respective guilds, pay 100 gold each and learn new tricks.
  • They’re then ready to leave for their next delve, out in the farmlands they encounter a patrol of horsemen and talk with them a little. They learn that the adventuring party « The Protectors » led by Bayard came back from Gundeholfen a few days ago with 9 pairs of hobgoblin ears that will earn them money by one Reginald in town, a Halfling inn-owner who pays for any dead hobgoblins.
  • The PCs are unsure if they can do something about that at first but then decide to turn back and talk to Reginald at his inn. They learn thar Reginald’s village had suffered heavily from hobgoblin raids in his youth and now he spends his money to avenge himself.
  • TBC…

Closing comments:

  • No big eventful things happening but a very useful session nonetheless for the players as they progress in their knowledge of Gunderholfen.
  • Jedri will be a nice addition to the team.
  • I finally chose how to deal with the Ganfal swamp in my game: I make Aracyne the hunter makes a bushcraft check, that’s a skill in DB, if he succeeds there’s still a 1 on 6 chance of encounters, if he fails there’s a roll on the Dragonbane journeys’ mishaps table and also a 1 on 6 chance of encounters. At the moment, there’s still a bit more than 50% chance that something inconvenient/bad happening which seems fair to me.
  • Forka learned the heroic ability Massive Blow with his weeklong training and Aracyne learned Fast Footwork with his.

Next session