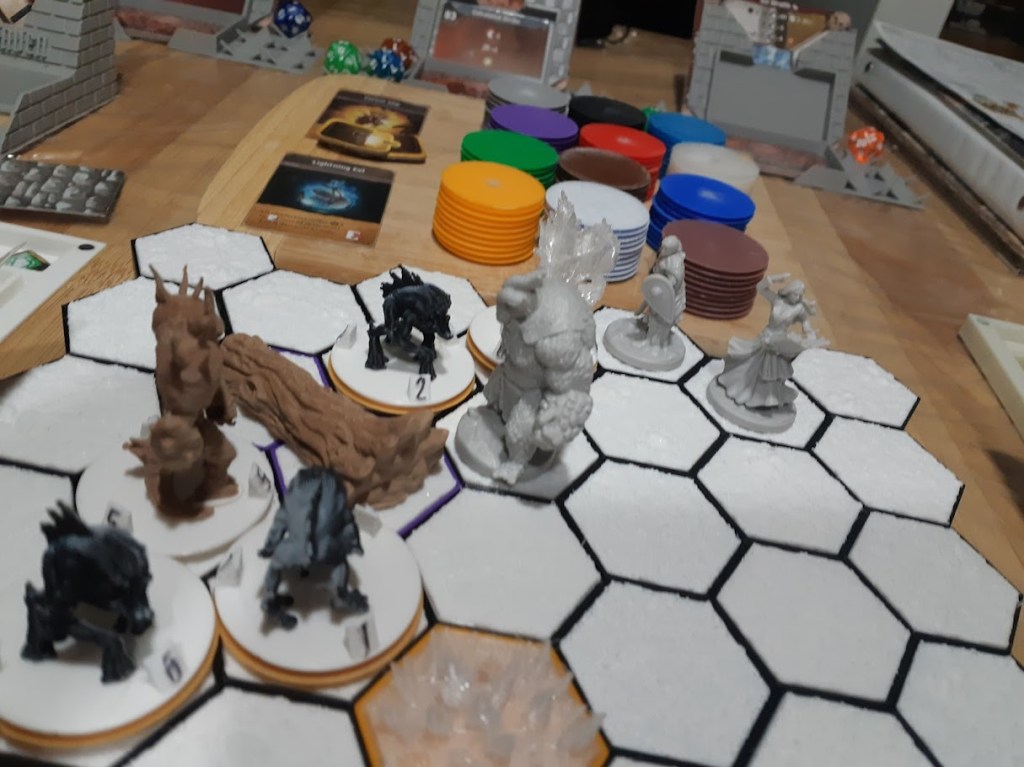
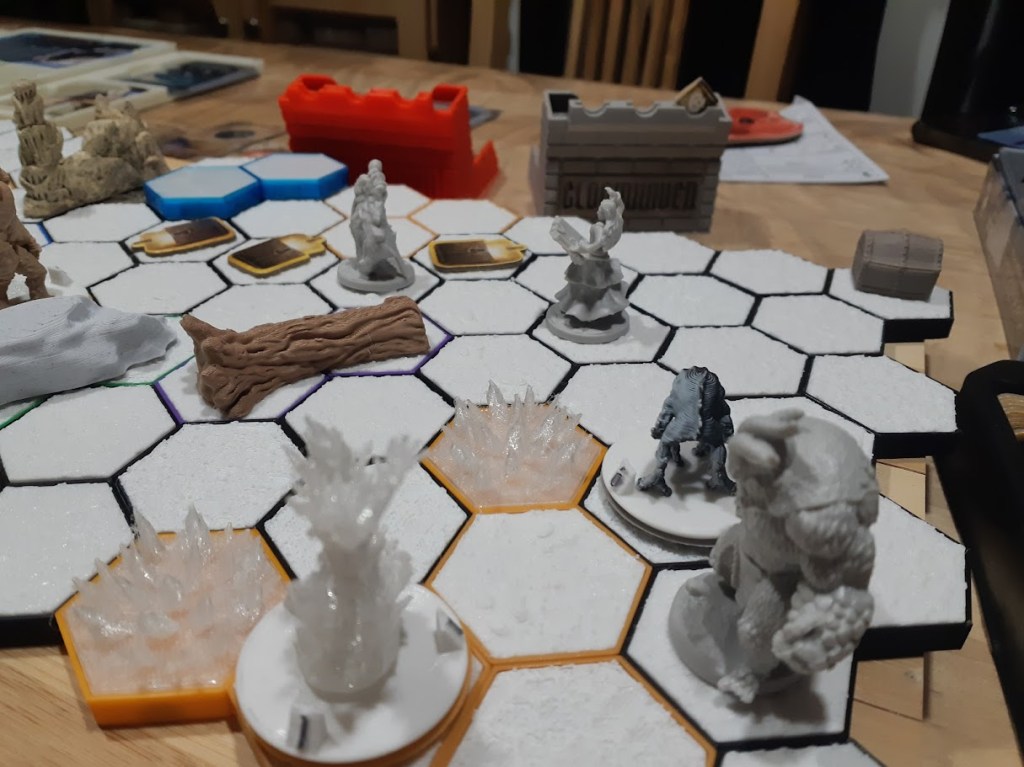
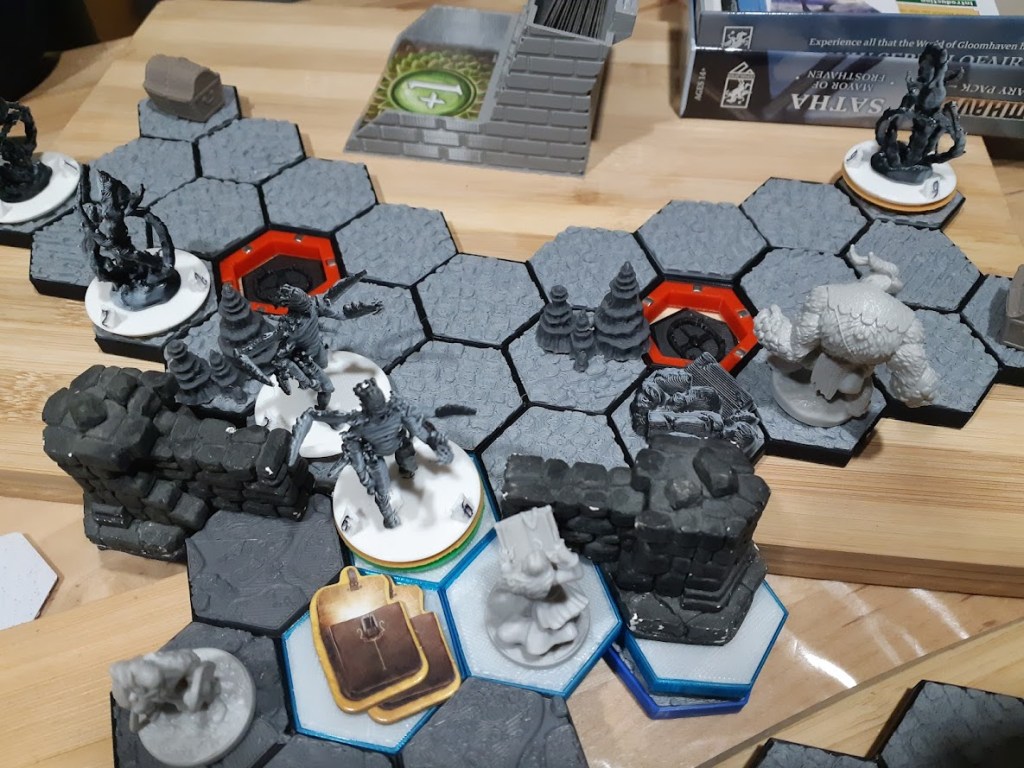
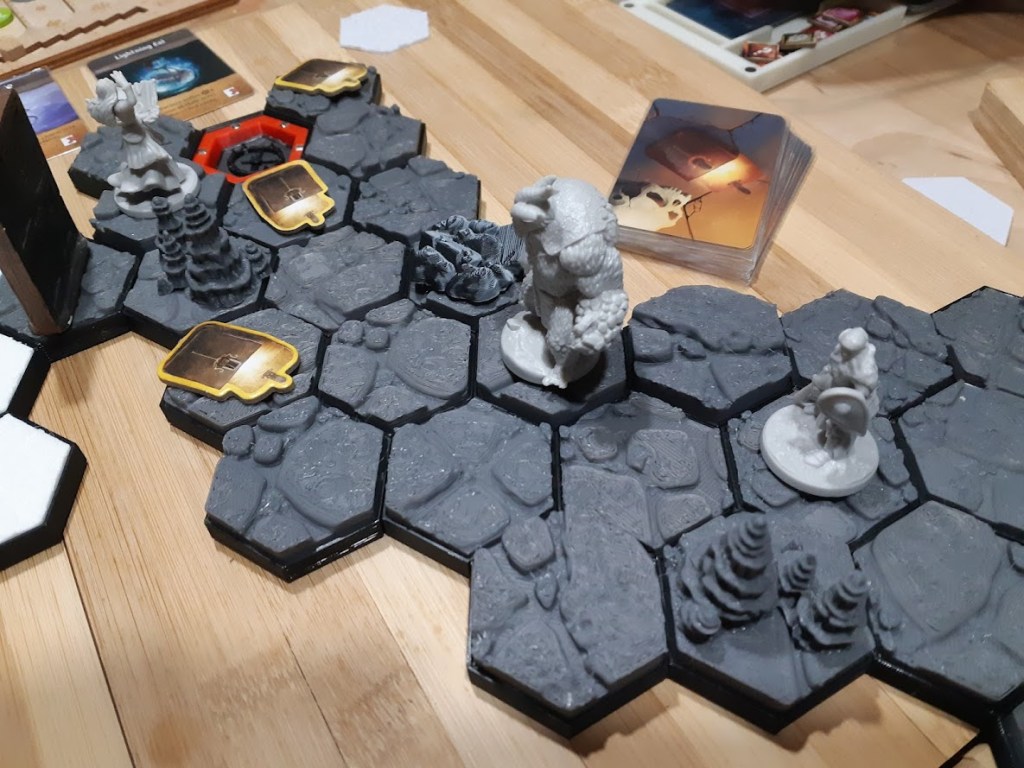
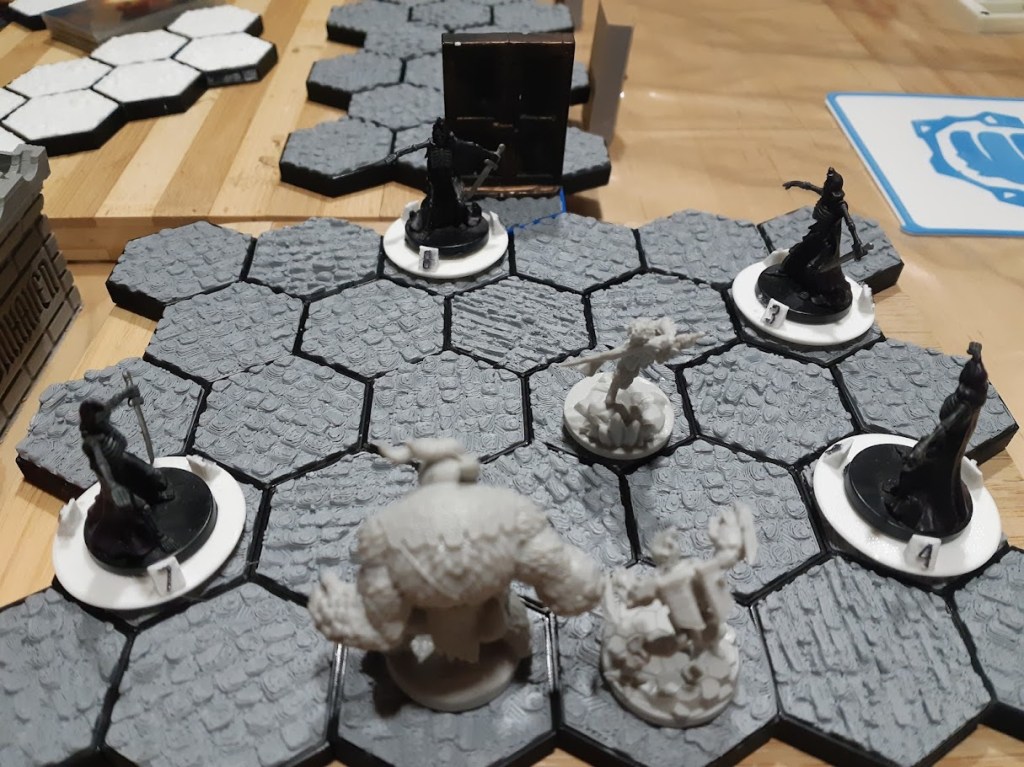
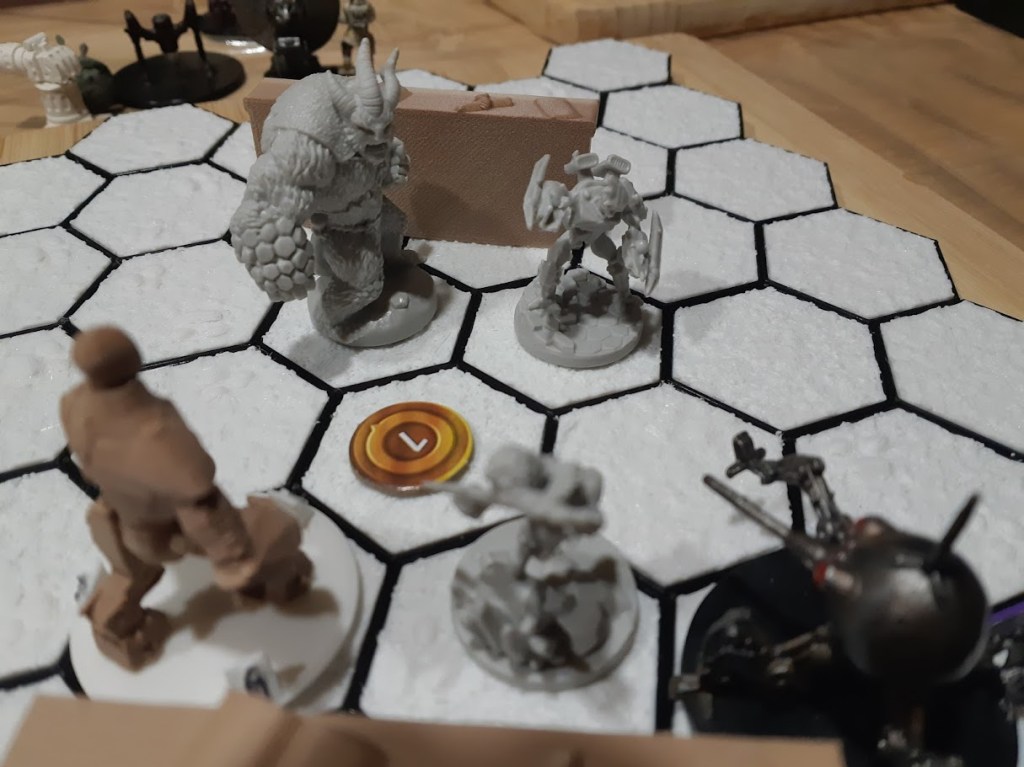
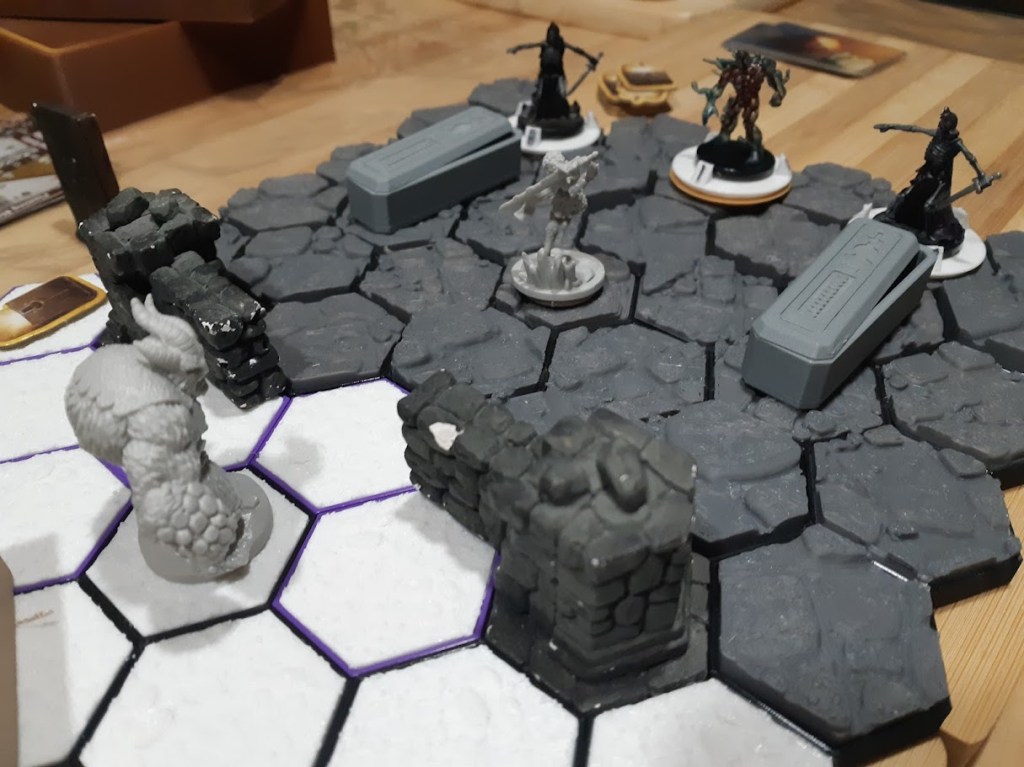
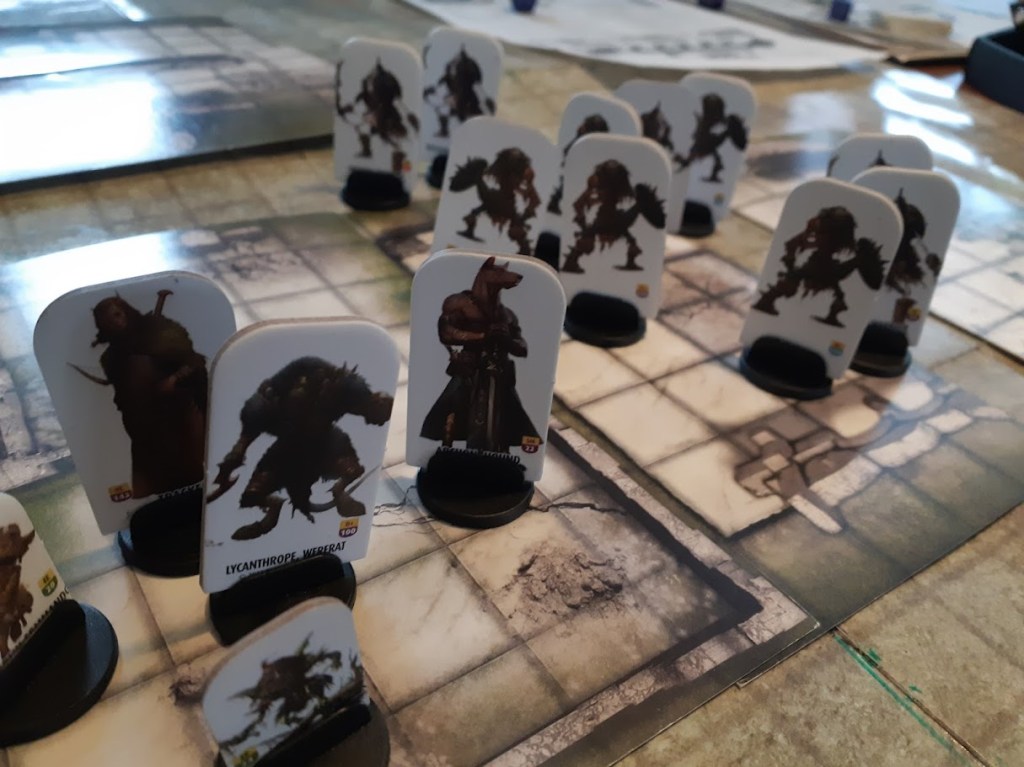
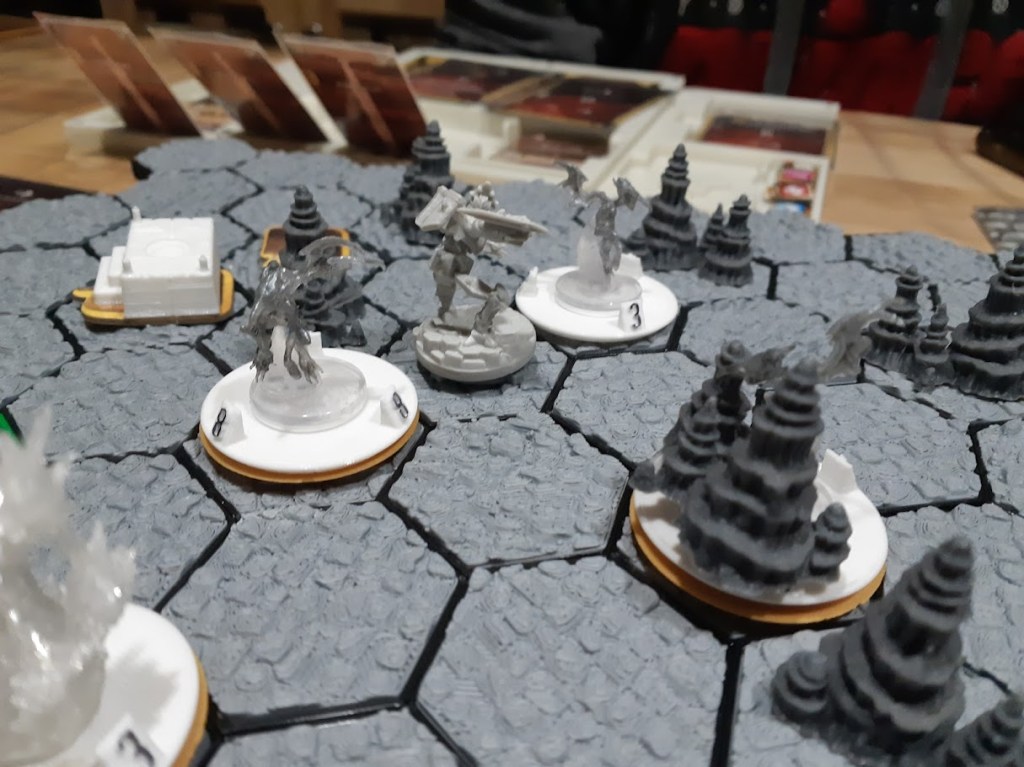
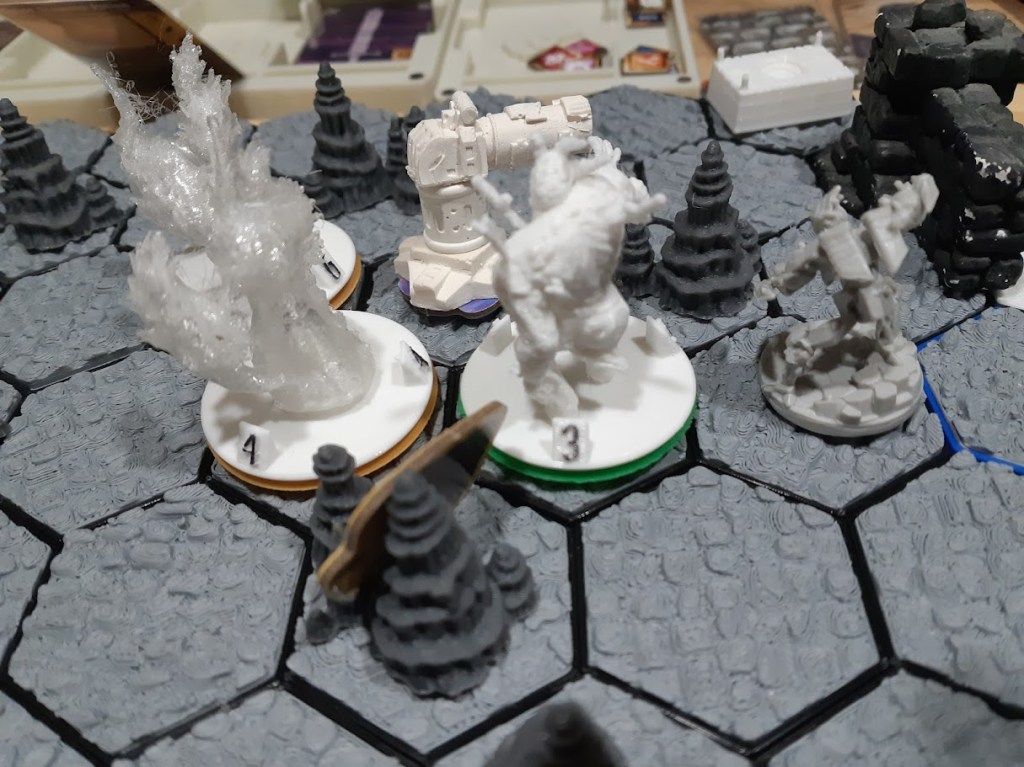
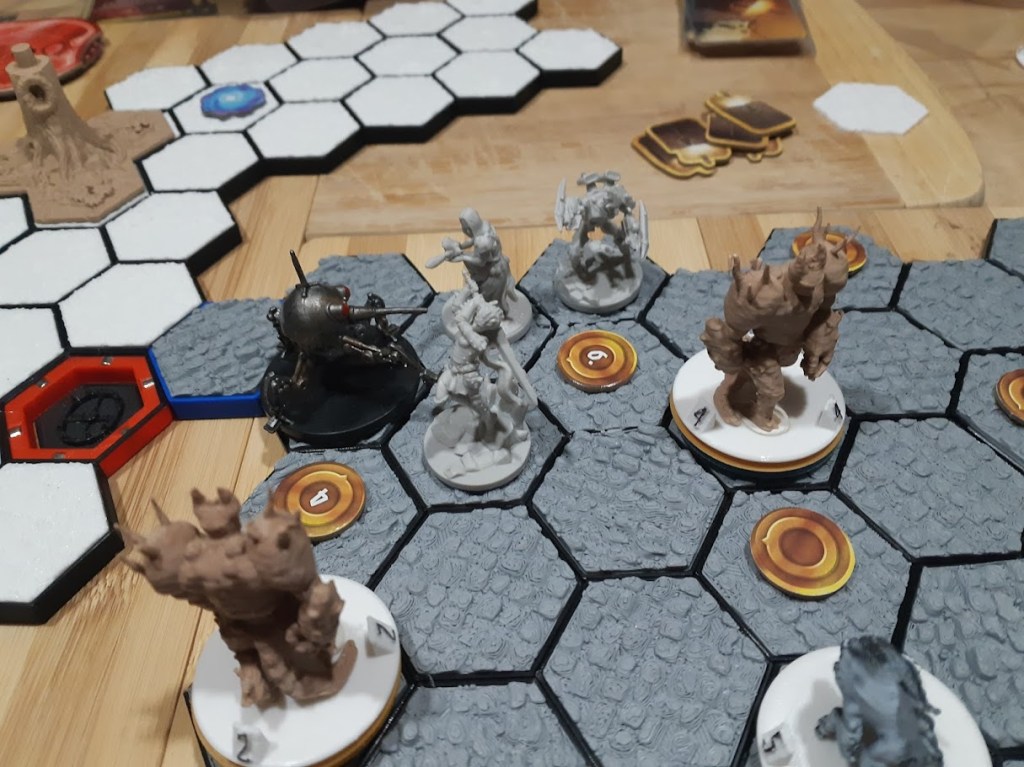
Math, with his new character, has the personal quest of slaying a bunch of different undead monsters using his Axe of the Abyss. So here we are, with an optional scenario that got Ice Wraiths in it, among other things.
Characters
Zam Boni the Frozen Fist (David) lvl 4, big dude but very graceful on ice
Satha the Mayor of Frosthaven (Math) lvl 4, taking matters into her own hands
Hail the Irritable Enchanter (Guillaume) lvl 4, will she get irritated enough to care?
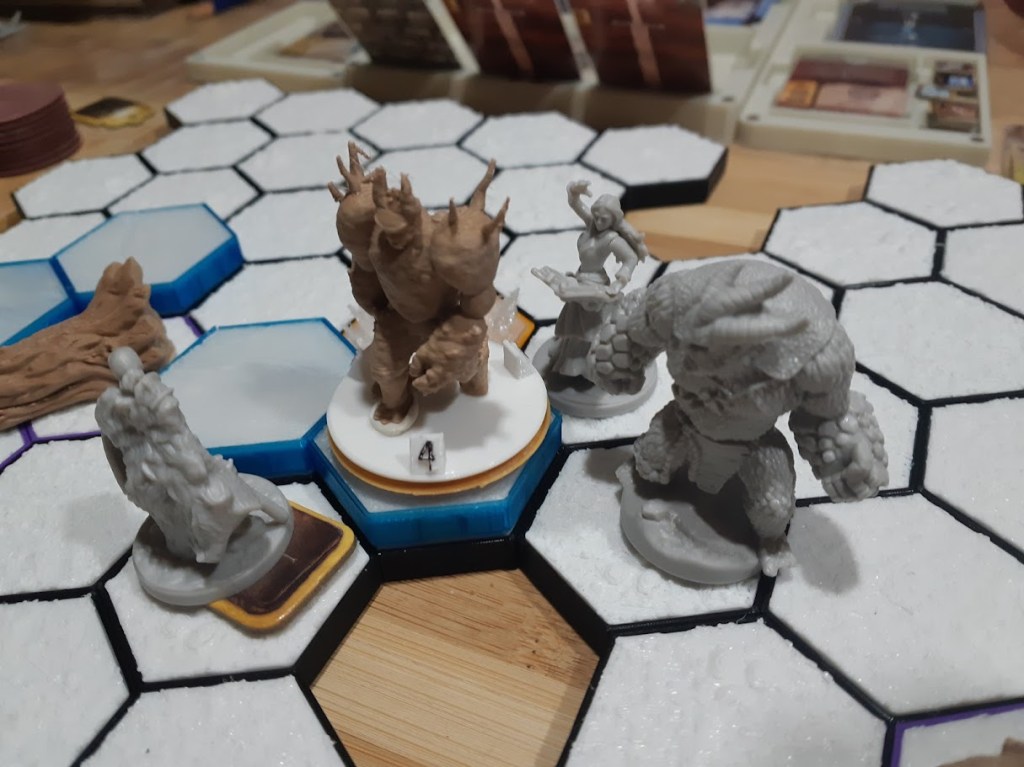
We have to kill the Lady in White, an evil spirit that hides in the forest. This a simple destroy the objectives (three trees) scenario with a mini boss at the end. There’s one complication though – each time a tree is hit and not destroyed right away, they spawn a black imp.
Satha wants the Ice Wraith for herself. It’s okay, there’s plenty of those pesky Black Imps to kill for Hail and Zam.We’ve surrounded this big bag of hit points, an Earth Demon.Let’s smash down this evil tree.Further in the forest, there’s still work to do.Where’s the Lady in White?She has nowhere to hide now!Satha is having a hard time in a duel againt an elite Earth Demon. Let’s switch places…This is Victory!
Closing Comments:
A real slog of a scenario, it took a long time to kill the monsters (not mandatory, to be fair), the trees and the mini boss one after the other.
I coulnd’t do Brittle on the objectives/trees as per the rules, that cut a big part of my game right there. Annoying.
Hail, as a low stamina character, has it relatively easy with two tanky companions to protect her at all time. She could even afford to exhaust near the end of the scenario.
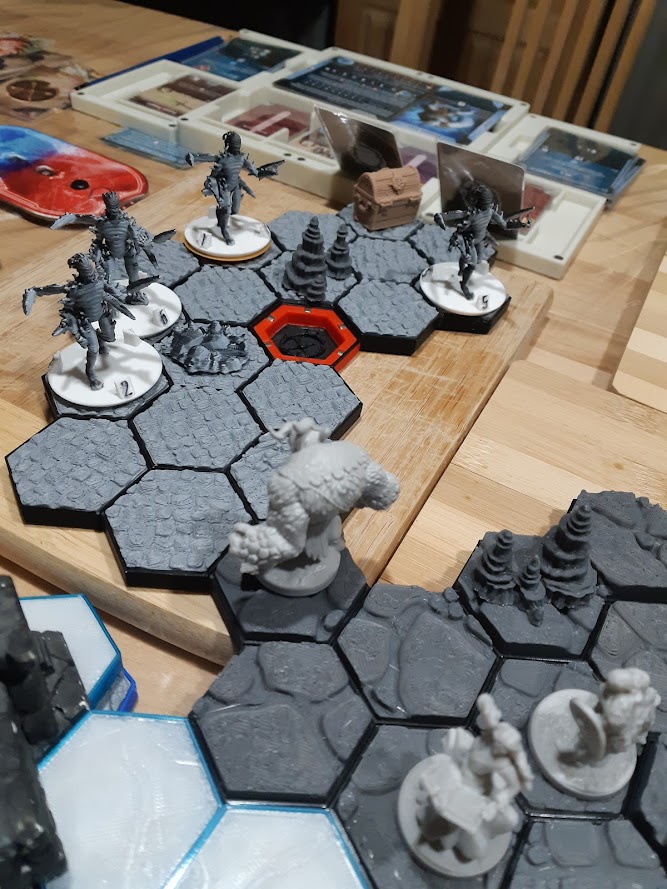
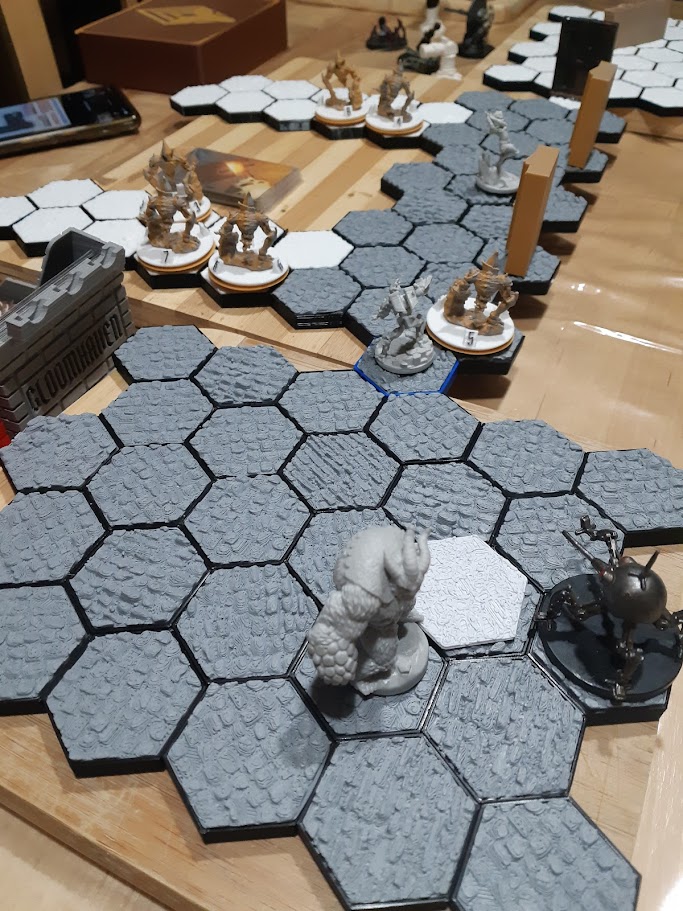
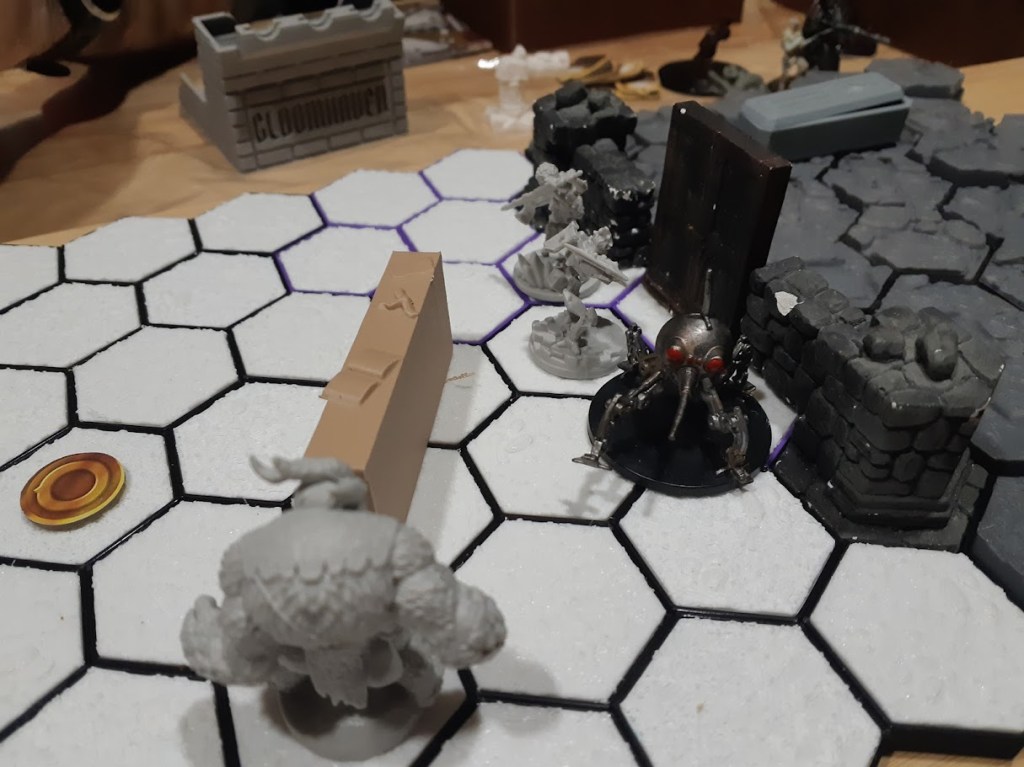
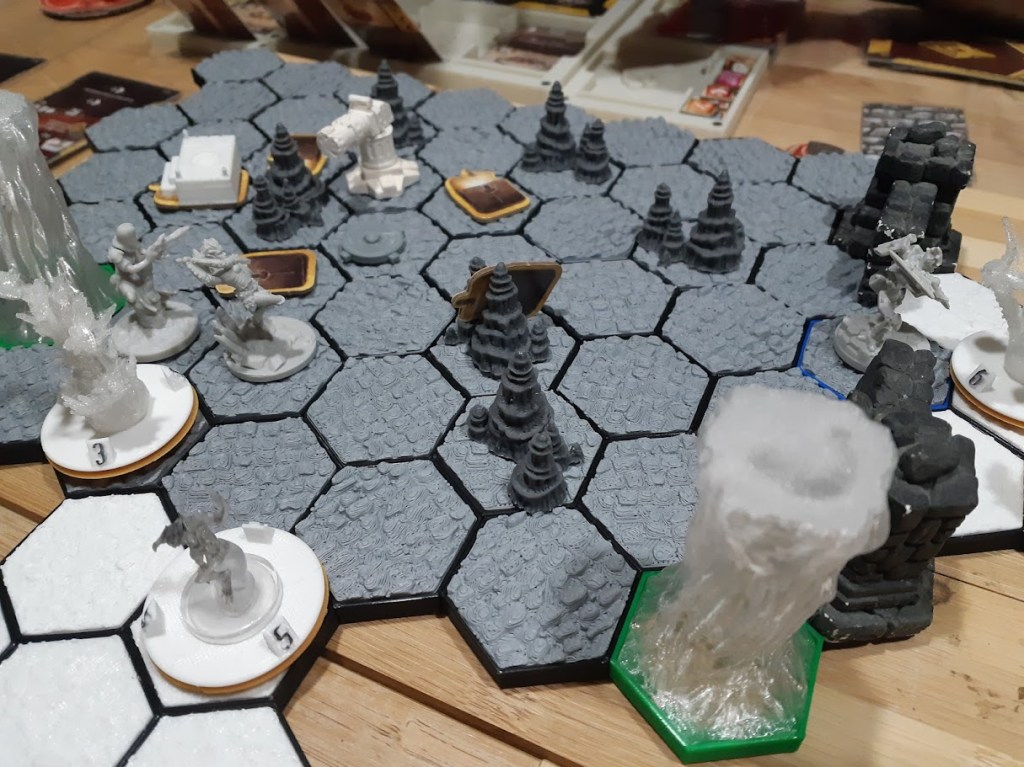
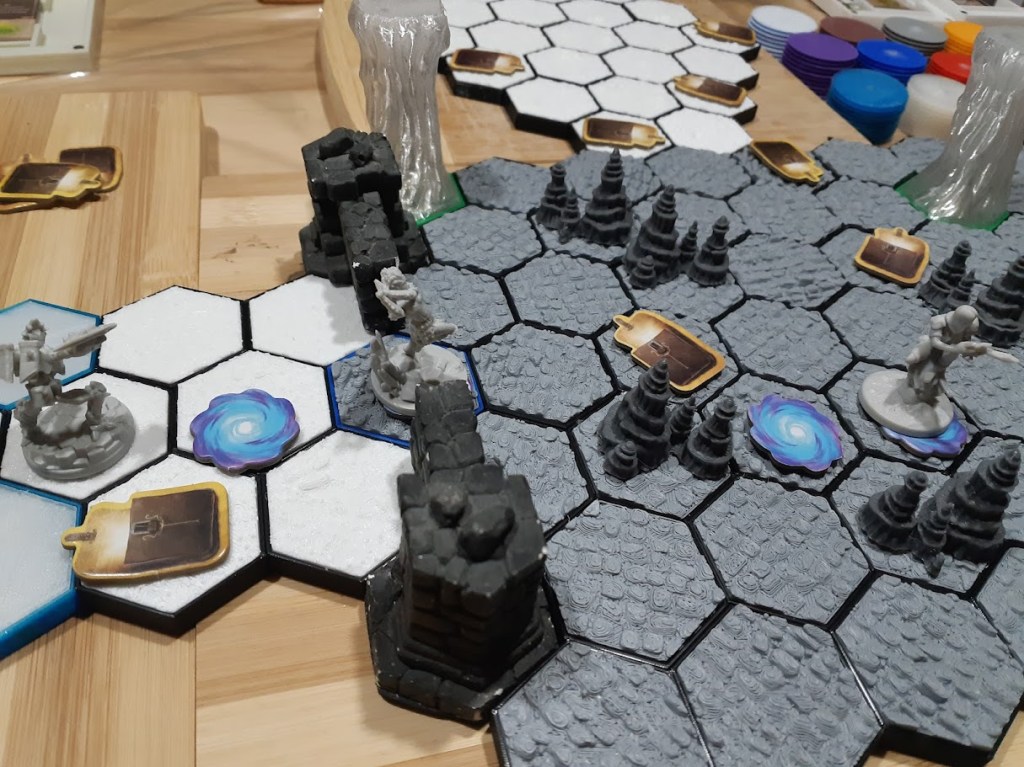
We’re advancing the lurker sub-campaign as we still have a character to unlock in this one. We’re now playing with two new characters from the newly-available mercenary packs: Satha and Hail, former NPCs and now the real deal!
Characters
Zam Boni the Frozen Fist (David) lvl 4, big dude but very graceful on ice
Satha the Mayor of Frosthaven (Math) lvl 4, taking matters into her own hands
Hail the Irritable Enchanter (Guillaume) lvl 4, will she get irritated enough to care?
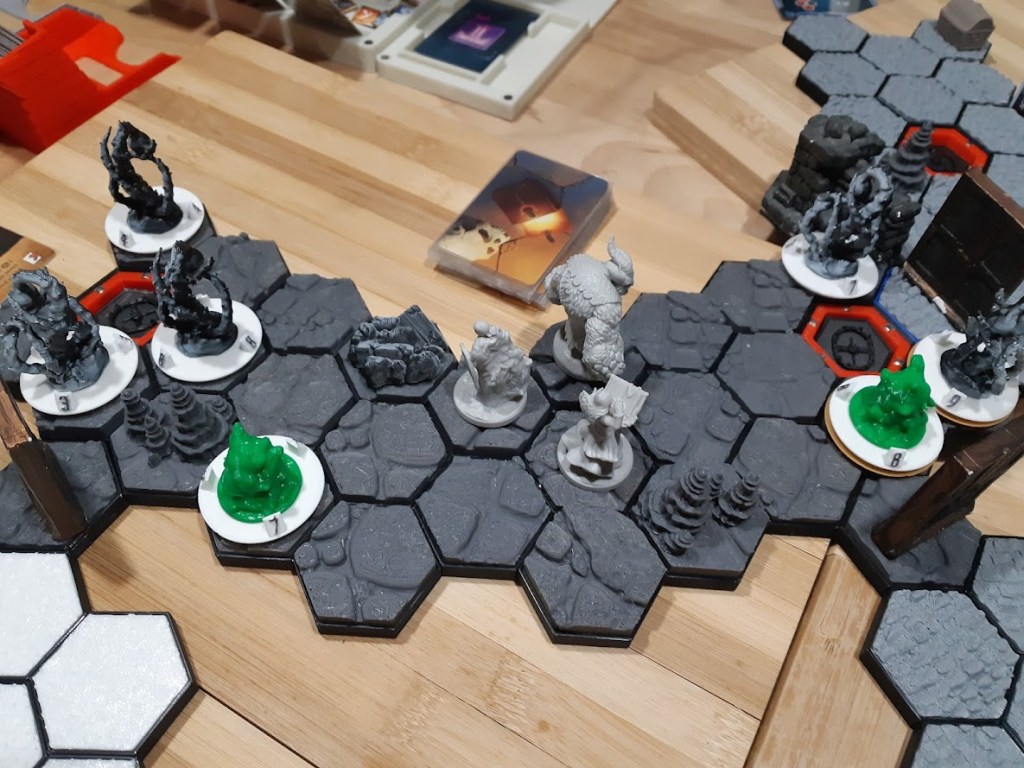
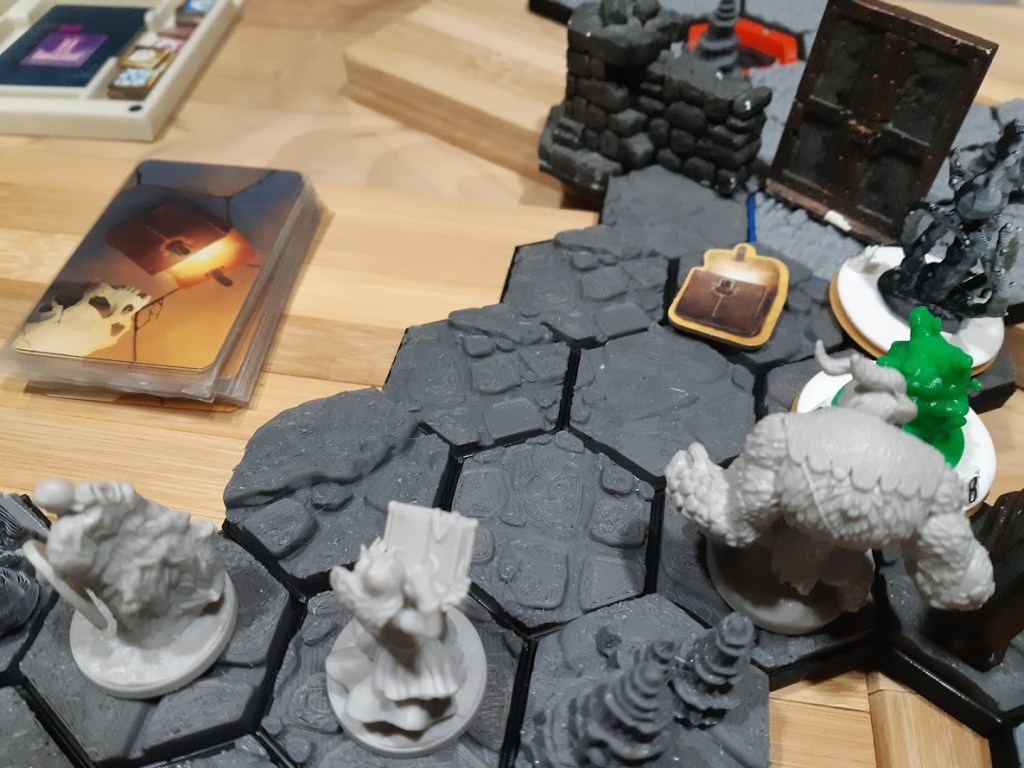
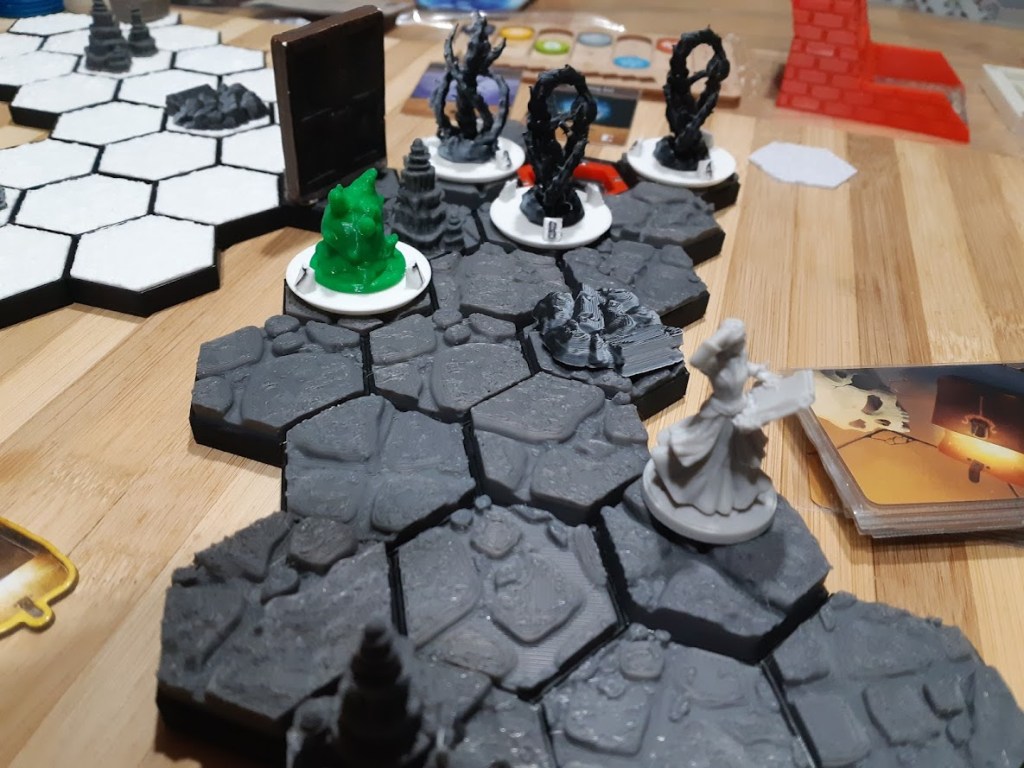
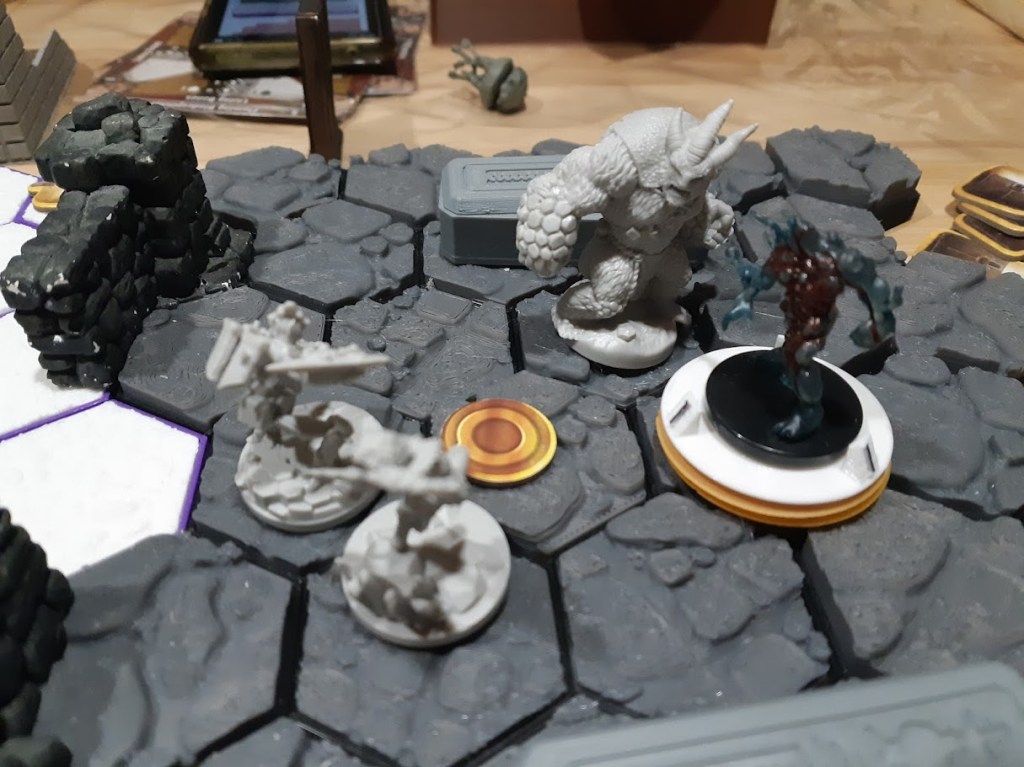
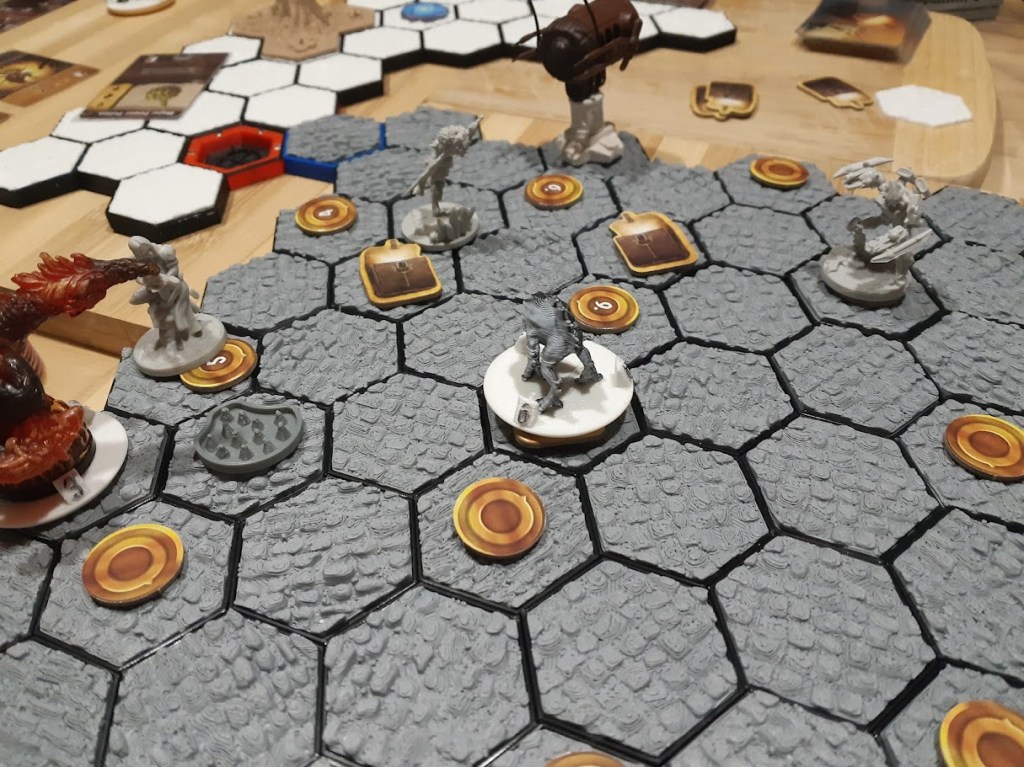
A subaquatic scenario (in theming) where we have to loot the five objectives, of course with a lot of baddies in the way within a big map.
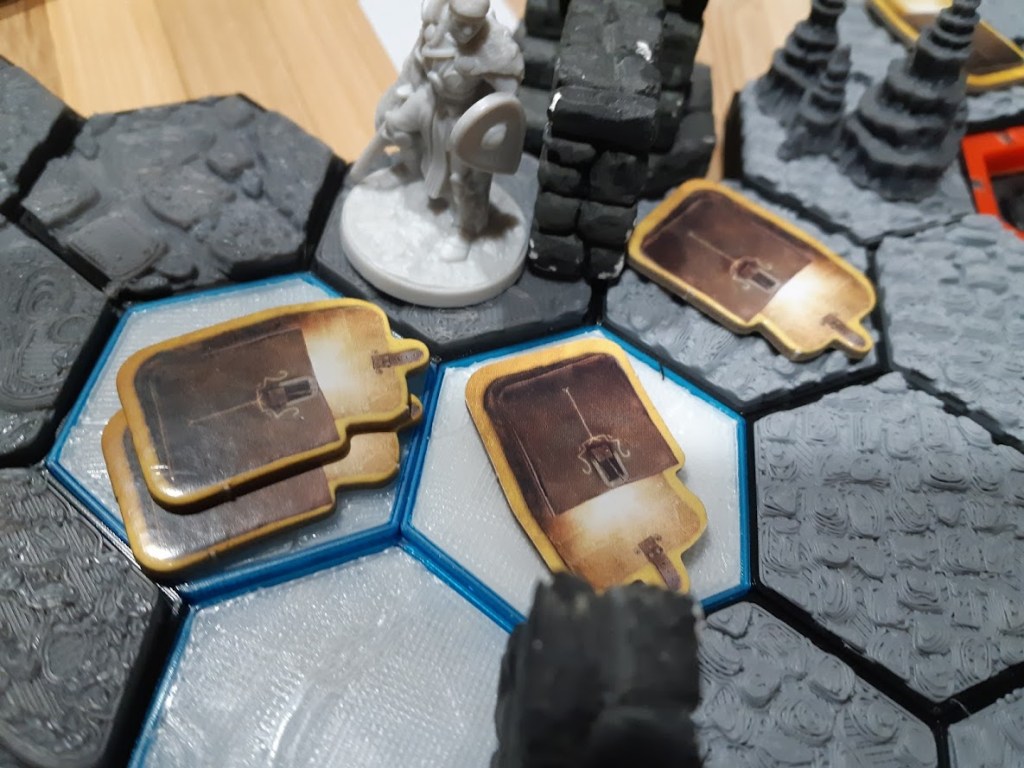
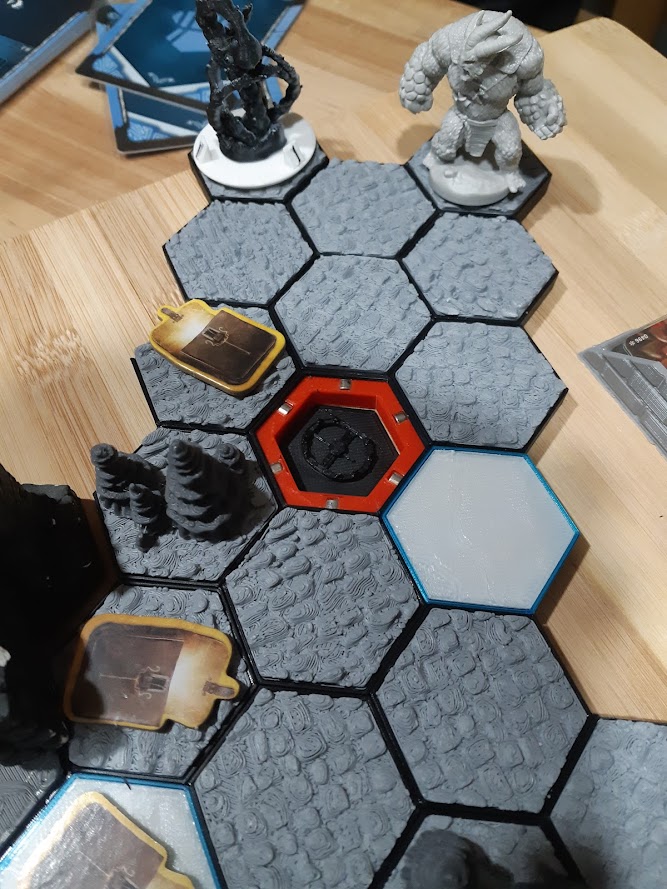
We’re surrounded by Deep Terrors and slimy things!Let’s go on this side first. (Satha grants a move and Zam pulls a DT into a trap).« Oh so sorry, forgot to tell you my lil’ friend, I’ve put ice on the ground! »Night Demons also inhabit this sunless trench and they’re not happy to see us…Hail is irritated, she always is, and start to kill things to blow off steam.Satha: « cleared ».This side is completed.Hail has done good works too! « Don’t stand there like an idiot and open this damn door! »Frozen Fist: »I think the slimes want to communicate? No? Wait,was that a feeble attack? I can’t tell… »Sooo, that’s where you meet? Feelin’ lonely down there maybe?Piss off Night Demons! I have a job to do!Waitaminute, shiny things over there. Yep, we’re good to go.Zam Boni has amassed quite the haul!
Closing Comments:
It seemed like everything went our way this time around. We have three great characters that work nicely together, that helps a lot.
Math already unlocked one mastery, « granting » to his allies every single rounds. Very useful character and will be great under Math, a natural puppet master :P.
Hail has probably the best theming of any haven characters imo, with cards names like « beneath me », « crazy antics », « can’t be bothered » and her irritation mechanics!
The Deep Terrors were pretty ineffective all along, attacking in straight line with no targets and so on.
The brittle-giving strategy is proving to be absolutely brutal, doing short work of otherwise hard opponents.
Jedri, Ratman Thief, he likes his rat-shape curse (Isaac)
Grimoire, Goblin Mage, frail but smart (Isaac)
Forka, Dogman Knight, fierce warrior (Edmond)
Torch, Goblin Knight, not expendable anymore (Edmond)
This session’s main goal: finish the orcs
What the other adventuring guilds are doing at the moment:
Green Imps: training in Longfelt
The Protectors: adventuring, left Longfelt for Gunderholfen
Black Axes: adventuring, try to find a tower in Ganfal swamp
The Musers: adventuring, left Longfelt but kept quiet on their objective
Gunderholfen – Level 4A – Great Altar Cave
The Battle Brothers have just killed the 10 orc archers that were guarding the entrance of the Great Altar Cave but now they hear many more orcs coming from around the corner to the north west. Two orcs with heavy crossbows come first, one shooting at Forka but the crossbow bolt bounces off his armor, and the other misses Torch. Two other crossbowmen run across the nearby rope-bridge in order to have a good shooting angle.
Aracyne makes a risky leap to the eastern cliff and manages to climb up to get atop the promontory. He quickly takes his bow and kill one crossbowman with two arrows (twin shot). The other plunges to his death after Grimoire attacks him with a Mental Strike (telekinetic push).
But more orcs move to attack the outnumbered adventurers, five brandishing falchions and five with spears attacking from behind, all wearing chainmail. Forka attacked one with his two-hands hammer, killing him with a massive blow but then the spearmen jab him several times and wound him badly. Jedri jumps into action with sword and light flail and kill an orc with two well-aimed blows.
Fearing for his life, Forka shove the falchion-wielding orc in front of him, sending him crashing into the back rank, and he gets out of his near-encirclement. Torch takes care to guard Forka’s flank and stab an orc with his spear, hurting him lightly. Jedri manages to dodge several attacks coming his way.
Aracyne does an headshot (crit) to an orc spearman, killing him instantly. A crossbowman aims at the goblin mage and hits him, inflicting a severe wound (1 hp remaining!), the other aims at Aracyne but the elf manages to dodge the incoming bolt. Forka kills another falchion-wielder. Grimoire avenges himself with another Mental Strike, pushing the two crossbowmen off the promontory to their deaths.
The adventurers have now the upper hand as they manage to kill several other orcs but they can hear yet more orcs coming from the same direction and only Aracyne is unscathed among them. Torch is okayish but Grimoire and Forka are both severely wounded, Jedri only lightly but is exhausted (no more willpower pts, can’t fuel his heroic abilities anymore). Grimoire does a Levitate on Torch to bring him on his side of the cave, at the entrance beyond the cliff. Forka and Jedri jump over there. A bigger group of orcs is now in sight with its bardiche-armed chieftain in the middle. Several orcs throw spears at the retreating adventurers but none hit their targets.
The Battle Brothers run to the west to go directly at their outpost. The orcs have no way to follow quickly and press their advantage.
En route, Jedri is attacked by a Giant Cave Lizard coming from the south but he slays it efficiently with his two weapons.
They reach their outpost and barricade themselves so they can rest safely. Not long after, they can hear some orcs looking for them close by, probably checking. the stairs to Level 3. The orcs still doesn’t seem to know that the PCs have taken over the Ogres’ den (and aren’t eager to inspect the place as they had been enemies).
Five hours later they hear a knock on the door, its Bayard’s guild, the Protectors! Aracyne asks if the allied guild would be so kind as to offer healing and Bayard answers that it wouldn’t be free: how about 80 gp, the amount that Aracyne once asked to the at the moment hard-pressed Protectors? No deal. But still, the allies are glad to see each other.
Closing Comments:
The PCs had decimated the orc archers with ease the previous session but now it was a very, very close fight, with character death looming just a step away. Aracyne and Grimoire were very efficient with arrows and telekinetic pushes respectively but the three melee fighters were in a perilous situation. Good armor and good evade ability have its limits when against 3:1 numerical superiority with a back rank able to reach.
The orcs have once again repelled the adventurers but it’s clearly a pyrrhic victory for them, having lost 21 warriors between the two sessions and 6 more if we count the first assault. They still have a decent fighting force but they’ve been weakened for sure, probably enough to warrant a change on how they defend their territory.
We’re playing a random scenario, chosen mainly because it can advance both the Infuser and the Hive’s personal quests, with their subsequent retirements afterward. Also, I’m playing a new character fo this one, the Frozen Fist, with a huge mini compared to what I’ve got before (trapper and deepwraith were especially small).
Characters
Zam Boni the Frozen Fist (David) lvl 4, big dude but very graceful on ice
4H2 the Hive (Math) lvl 7, refurbished robotic assembly, ADHD
Teabag the Infuser (Guillaume) lvl 7, no, no, not this kind of teabag or is it?
This a long one, with a strange premise of being invited to a kind of run the gauntlet game in 5 « episodes » and we could stop after any one of them and call it a day.
We’re here, start the damn thing!
Closing Comments:
We did all 5 episodes but it was a close thing, we did not have many cards left at the end at all.
Stamina and mobility are obviously really important for this one if you want to go through in one go.
Episode 4 in particular, with flaming bladespinners and boltshooters could be quite brutal I’d imagine with a bit of bad luck or if not handled carefully.
I didn’t inflict a lot of damage with my Frozen Fist but I put a lot of BRITTLE conditions throughout that my companions could then use to do massive damage, very powerful ability, I like it.
Edmond had this idea of acquiring some sort of ballista on wheels and I had to explain the impracticality of it inside a dungeon environment sadly. Could have said yes and he wouldn’t have get past the chasm and rope bridge of Level 1 and crushed his dreams that way…
Jedri, Ratman Thief, he likes his rat-shape curse (Isaac)
Grimoire, Goblin Mage, frail but smart (Isaac)
Forka, Dogman Knight, fierce warrior (Edmond)
Torch, Goblin Knight, not expendable anymore (Edmond)
This session’s main goal: kill the orcs’ first line of defense
What the other adventuring guilds are doing at the moment:
Green Imps: training in Longfelt
The Protectors: exploring Longfelt’s underworks
Black Axes: adventuring, try to find a tower in Ganfal swamp
The Musers: left Longfelt but kept quiet on their objective
Longfelt
The Battle Brothers stay the night at the Hare & Hound Inn. They buy some field rations. Jedri pays to repair his morningstar. Torch would like to buy an oversized crossbow but finds it too expensive. Forca pays some rounds in taverns and listens to rumors: « The Wizard Balfour’s tower is rumoured to hold great treasure. » And: « A group of bandits is operating out of Prickly’s End Forest. They have so far been able to evade the Baron’s forces. Their leader, Uthbarth the Pike, is wanted, dead or alive. »
Ganfal Swamp
On their way to Gunderholfen they encounter a group of four hostile Ogres and have to fight them. Forca got hit by a powerful blow and barely stands on his feet but Grimoire heals him back to health after the fight. They find suspicious meat, foul-smelling tobacco, smoking pipes and a few coins but not much else.
Closer to the dungeon they spot some broken statues of hobgoblins in awkward poses. The elf hunter can see oversized chicken feet tracks all around. The « statues » are the work of a Basilisk it seems, but fortunately it’s nowhere in sight.
Gunderholfen
They make a stop at Fryniwyd’s new shop. They chat a little and buy a vial of paralytic poison extracted very recently from a local cave scorpion.
They go down via their usual shortcuts, have reached Level 3 and only have a few rooms to go to the stairs leading to Level 4 but… they can see that the series of doors leading south are all open! That means… Yes, there it is, you can see it, can you? The floating sword! The Gelatinous Cube is upon us! Torch the goblin reacts quickly and burns it with his torch and it seems that fire work amazingly well against it. The Cube counters on Torch, firing a big ball of corrosive slime but most of it didn’t touch the goblin (minimum damage). Forka is reluctant to get close to it, Aracyne let go of two arrows, doing very good damage. Grimoire channels maximum mana into a spell to send 3 Fireballs at once into the Gelatinous Cube and slays the big slime monster! The freed sword clanks on the ground. Jedri takes it, remove the scabard and everyone can see a dim purple light emanating from the blade. There’s writing on it, its name is Perseverance.
This done, they go directly to their Level 4 outpost. It hasn’t been disturbed in their absence apparently. They add another barrel of dry meat to their emergency food stash.
Thence, they go south and east to reach the great cave inhabited by the orcs. Exactly as the previous time there’s 10 orc archers, 5 sentries on each side of the cave entrance, on higher grounds than the invaders. The orcs act first and fire a volley, no questions asked, inflicting a few wounds on the adventurers but nothing too bad. Grimoire casts Levitate on Forka who lands on the western promontory and immediately kill an archer with a massive hammer blow. Aracyne kill two orcs with arrows. Torch wounds another with a thrown spear, finished by a thrown dagger from Jedri. Now five against six, the adventurers continue the onslaught as Jedri joins Forka with another Levitate, and kills an orc with his new magic sword. Aracyne kills another orc but then his bow almost breaks in two and is damaged. Grimoire the goblin mage is the target of a deadly arrow but he is saved by his fellow goblin companion who takes the hit instead on his armored self, with lesser consequences. The adventurers have the upper hand and finish off the orc archers who chose to fight to their bitter but swift end, their calls for reinforcement not yet answered.
The PCs can hear a lot of commotion from further north and west. The orcs are far from defeated.
TBC…
Closing comments:
The past few years I’ve slowly learned to embrace random tables as a Dungeon Master, having « learned » my trade (if we can say that) in the 90s when it wasn’t a popular thing to do at all. Random encounters are simple enough to use or design, and a staple of dungeon-delving and understandably a main component of OSR gaming. But I’m still trying to improve my homebrewed random tables, specifically for the other adventuring parties’ actions. I could easily decide by myself what they’re up to but that’s not the point. Impartiality is the point. Emergent story is even more the point I should say. Anyway, a work in progress it definitely is.
For the Gelatinous Cube I’ve used the statblock of the Giant Amoeba from the DB Bestiary, simply added a camouflage ability. It’s a pretty powerful monster in fact with 64 hp and ferocity 2, but takes double damage from fire, which fortunately the players exploited almost immediately.
Isaac had the idea of hiring mining folks to dig a tunnel to reach the orcs from a less unfavorable direction, but he changed his mind after I said it would take at least 10 days of digging, maybe a month, with something like 6 gp per day to pay the crew in salary and food. So it had to be a frontal assault instead. Their characters are better equipped and stronger than last time but the orcs are a lot more numerous than the players suspect.
Our family just did a no-screens weekend as a kind of mental detox. No computer, no tv, no cellphone, no nothing. And it went so well that the kids would do it again every other weekend!
And guess what doesn’t need any screen? You got it.
Jedri, Ratman Thief, he likes his rat-shape curse (Isaac)
Grimoire, Goblin Mage, frail but smart (Isaac)
Forka, Dogman Knight, fierce warrior (Edmond)
Torch, Goblin Knight, not expendable anymore (Edmond)
This session’s main goal: exploring more than half of the « dwarven city »
What the other adventuring guilds are doing at the moment:
Green Imps: adventuring but not in Gunderholfen
The Protectors: resting/recuperating in Longfelt, Bodil is concussed, Bodil and Efram have infected wounds
Black Axes: adventuring in Gunderholfen, Level 2 and 3
The Musers: leisure in Longfelt
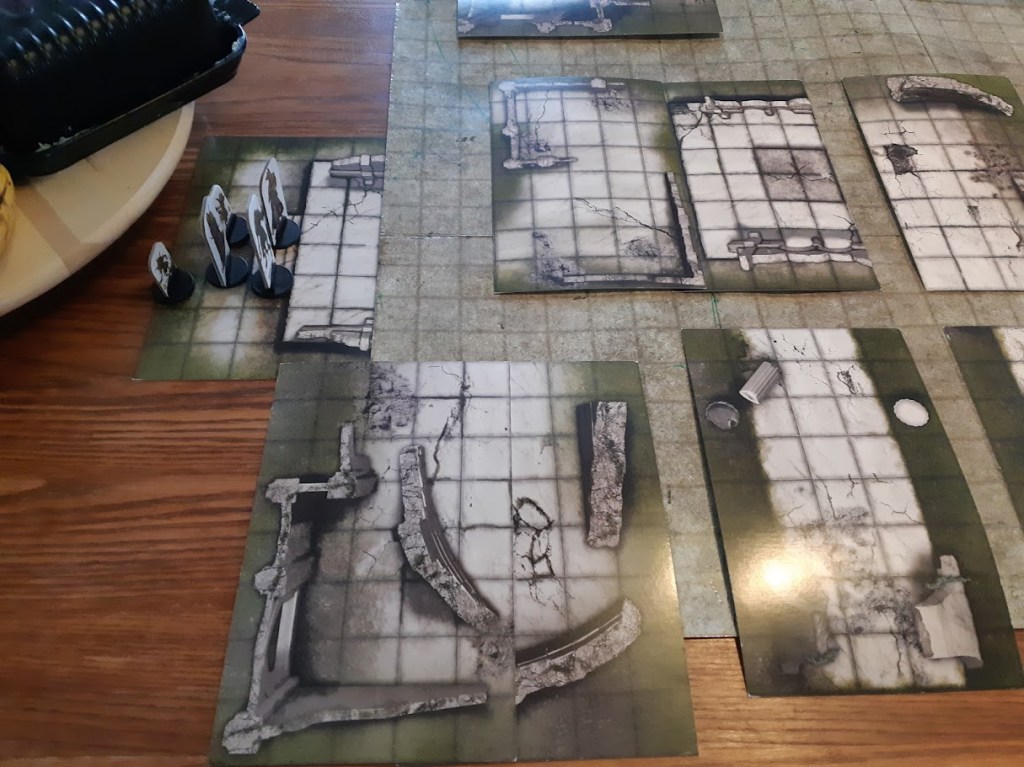
Level 4A outpost
The Battle Brother did not leave the dungeon last time but rather, they’d rested in their Level 4A’s outpost and did so without any disturbance. Rejuvenated they went back directly to the cavern of the flaming bats, the two surviving ones were in no mood to fight.
Level 4B
From there a passage leads to a cave with an obelisk in the middle with writings in dwarvish. Nobody can read it but Forka knows (myth & lore check) that this must the entrance to Nharzed, the City of the Masons, a place renowned for its craftsmanship before the War of the Long-Lived.
A slight breeze is coming from the south, bringing an awful stench of death to the adventurers’ nostrils.
There’s a set of large steps leading up and a high crenated wall a bit further with a broad entrance from which mist furtively enters.
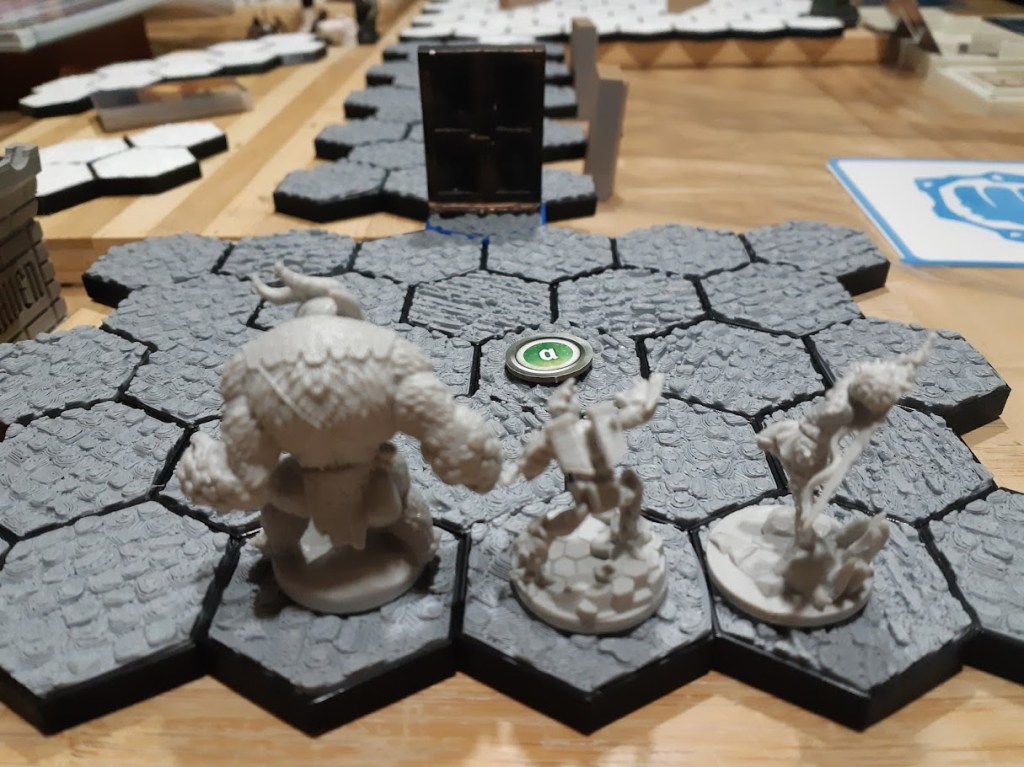
The PCs start to climb the steps but then a stocky humanoid gets out of the shadows, a dwarf but with dead flesh crawling with maggots: a Plague Zombie. Its stench is overhwelming and its presence is frightful to behold. Forka cannot will himself to attack it. Aracyne shoots two arrows, hitting the undead square in the chest but with no great effect. Grimoire pushes it with a Mental Strike, sending it tumbling violently backward almost thirty feet. But the undead gets up, and it is fast, and dashes toward the nearest adventurers and get into melee against Forka and Jedri, who both manage not to flee. A Fireball from Grimoire finally seems to do some real damage to the monster. Forka has a hard time with the awful stench that is even worst for his acute sense of smell and he gets wounded by a claw attack. One more Fireball from the goblin mage and then Jedri gets wounded but counters with a mighty hit (crit) to the dead dwarf’s head with his morningstar, splitting its skull open, slaying it to everyone’s relief.
Grimoire casts Treat Wound on Forka and Jedri and after that the party enters the City proper:
« Crumbling buildings from a forgotten age and cracked, worned streets stretch away through dim, gloomy mists.The cavern walls soar upwards out of sight, the space ahead vast and foreboding. Fallen walls, piles of rubble and shattered stone line the streets, the air heavy with the stench of fear. »
The PCs are exploring the nearest buildings and attract the attention of a group of ten skeletons. Forka, Jedri and Torch gets into melee, trying not to be surrounded, and get to work. They slay the skeletons without too much troubles, Jedri needs healing from Grimoire again but Forka and Torch only have a few scratches.
They continue exploring, see another group of undead east through crumbled walls and decide instead to go west and south. They enter an empty building and go to the next but are welcomed again by undead, this time eight Living Dead. At one point in the fight, Forka was forced on the ground and threatened by several hungry Living Dead but his companions helped him back up and the undead were defeated. They find a golden locket and silver lyre among the rubble inside the building.
They go east and get near some kind of temple but Forka can tell that the smell of death is even more awful in this place and they decide to go elsewhere.
Thence they go directly to a kind of central plaza with large standing stones that they can see further south and east. When they arrive there though all hell break loose as a pack of skeletal animals, 6 ghouls and 6 civic officer-garbed undead get out of several nearby buildings, mostly from the south, and all converge on the PCs. The latter choose to make a tactical retreat and run back to the building they’ve just cleared in order to benefit from the protection of mostly intact walls. Aracyne quickly perch himself up on top of a wall as the building is roofless, and start to rain arrows at the ghouls, wounding two severely, making those flee. Forca and Jedri block the entrance and fight the skeletal animals, with Torch using his spear to attack from behind. Aracyne shoot another ghoul, hurting it badly, and now the ghouls collectively have enough of the whole getting shot at thing (failed morale check) and all flee. The three fighters finish off the swarm of skeletal animals and get into melee against the « civic officers » undead but those don’t prove to be that fearsome and the adventurers have the upper hand ultimately. The fight finished, Grimoire heal the wounded.
The PCs decide to clear the northern area of the undead they saw earlier and soon get into a fight against ten more skeletons. Aracyne put his bow aside as it’s not that useful against skeletons, and get to work with his short sword alongside his companions. Grimoire, who was staying back, spots three ghouls (some of the group they saw earlier) that were trying to sneak up on them. He incinerates a ghoul with a big fireball and burns another with a smaller one. The two remaining ghouls flee again. Meanwhile the fight against the skeletons is under control, the adventurers got a few painfuls stabs here and there but they managed to win again.
Grimoire uses his last reserve of mana to heal the wounds. All of the adventurers are quite exhausted by the successive fights by now (depleted willpower points) and Aracyne, the guild leader, call it a day. The Battle Brother leave Nharzed behind, and go up, by their usual method of shortcuts, all the way to Level 1 where they make a short stop to talk the newly-installed gnome merchant Frinywid – who tells them that he saw another party of adventurers a bit earlier, the Black Axes. He wasn’t sure if they were going to rob him or worse at the time as they look like a bad batch he says, but they didn’t. They’re probably somewhere in Level 2 by now.
The Battle Brothers leave Gunderholfen, the trip through the Ganfal Swamp is fortunately uneventful and they reach Longfelt before the end of the day.
Closing comments:
Nothing happening while they rested at their Level 4 outpost between sessions. Rolled at random of course. There’s a countdown going on though (random too, but chances are increasingly higher the more time goes on), as the orcs will understand sooner or later that the ogres aren’t there anymore and they’ll want to look into their former den. The orcs, or maybe someone or something else will.
Several big fights in this session, there’s no xp for combat so I’m not sure that it really served the purpose of the players (apart from having fun) not to try evade them. They can certainly be systematic about it and clear one area after another but this will take a lot of time.
Level 4B, Nharzed, is a cool place, spooky and all. There is several special locations in the area but the players didn’t explore any of them this time, instead they explored one building after another full of rubbles. I think a random table of stuff to find in abandonned buildings or things happening or whatnot, would be great to make the area even more interesting. I may do just that for the next time they go there, we’ll see.
Crossing the Ganfal swamp in their depleted state was a bit risky, another big fight like last time could have doomed them.
Jedri, Ratman Thief, he likes his rat-shape curse (Isaac)
Grimoire, Goblin Mage, frail but smart (Isaac)
Forka, Dogman Knight, fierce warrior (Edmond)
Torch, Goblin Knight, not expendable anymore (Edmond)
This session’s main goal: find the « dwarven city »
What the other adventuring guilds are doing at the moment:
Green Imps: adventuring but not in Gunderholfen
The Protectors: resting/recuperating in Longfelt, Bodil is concussed, Bodil and Efram have infected wounds
Black Axes: leaving for Gunderholfen soon
The Musers: leisure in Longfelt
Longfelt
The BB buy a lot of food rations, put them into a small barrel, with the idea of leaving it inside their newly-acquired Level 4 outpost.
While taking their breakfast at the Hare & Hound Inn they are visited by a gnome merchant (and magic-user) named Frinywyd who has an offer for them. He wants to open shop into the liberated Level 1 of Gunderholfen and asks for the BB if they would escort his caravan to get there and they gladly accept.
Ganfal Swamp
The crossing is slower than usual, leading the caravan on the treacherous road half-eaten by the swamp. Halfway through, one side of the cart slides into muddy waters and it takes great effort from the group to get it back on firm land. (Forca get disheartened in the process)
Fortunately they reach their destination without further hindrances.
Gunderholfen
The BB advise the gnome merchant to occupy the room of the late goblin chief in Level 1B and he does so. They also take a look at his wares and Aracyne buys an amulet of spell focus. They see that the gnome sells bottled elementals that can help in fights but the asked price is a bit too steep.
They then go down to Level 2, have to defend themselves from several hungry Stirges and then take the secret ladder to Level 3. From there they cross the dead kiigoths’ territory and go down (very cautiously) the slippery stairs to Level 4.
They find their outpost undisturbed, door still staked, and they leave their rations inside. They write a quick message on the door: « The Battle Brothers are here » with a cray and leave to explore.
They first go nearby, just south of their outpost, and entered a warm area with low visibility due to steam. They hear a high-pitched laughter and a loud PLOP and see, barely, a small winged creature flying above them – a steam mephit. Aracyne has time to shoot an arrow at it and manages to hit it despite the obscuring vapor. Forca is convinced that the nearby stalagmite is a creature and hits it with his hammer, breaking a chunk of it but with no further result.
The wounded mephit avenges himself by creating a rain of scalding water on everyone below. Torch protects himself with his shield but the other adventurers are wounded (fortunately I rolled very low on damage). Another mephit sends a jet of hot water at Jedri, who fails to evade and is wounded. But then the PCs act. Aracyne finishes the wounded mephit with another well-place arrow. Grimoire casts a fireball at the other, hurting it ligthly. He then casts Levitate on Forca who smash the mephit with an hammer blow and kills it. With no further threat, Grimoire casts Treat Wound on Jedri and then PCs search for treasure and it takes some time but they finally find some ancient dwarven coins (10 gp each) that were stashed on top of a stalagmite.
Thence they go back at the intersection and go south and soon get in another fight despite their attempt at stealth, this time against a juvenile ankheg. An arrow from Aracyne is deflected by the insectoid’s carapace and the creature try to hit Jedri with one leg but he evades. The ratman then counters with two powerful hits from his light flail and morningstar, wounding the ankheg. Next, Forca delivers a massive blow of his hammer, so powerful that it detaches the monster’s head from its body, killing it instantly. The close by lair lair of the ankheg is littered with bones but nothing else.
The PCs continue on the path that they’ve been told leads to the the dwarven city, going east and south generally, and after that west, inside a long and warm natural passage that debouche in a large, even warmer cavern. The air is dense with mist.
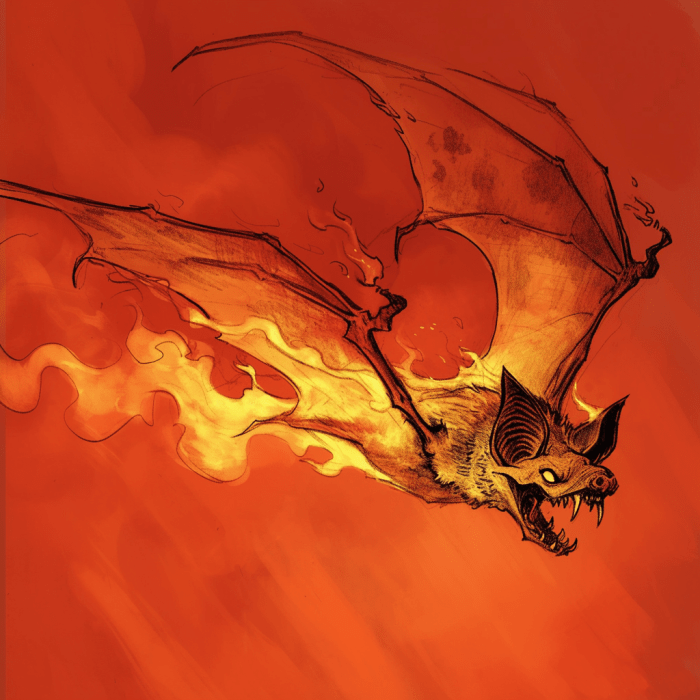
Forka the dogman, even with his helmet on, hears some kind of high-frequency sounds emanating from somewhere above and, through the mist, the PCs can see several glowing spots. They soon see what’s the meaning of all this when creatures plunge towards them: Flaming Bats!
5 Flaming Bats (with some other « warming up » above) get near the PCs. Two of them belch clouds of black smoke, partially obscuring the adventurers’ vision. Another try to rake Aracyne but he dodges. Same with Jedri. Another let go of a jet of fire on Forka but his armor protects him. The adventurers make quick work of all but one bat, but 3 more are coming to the fight! One makes a fiery dive towards Jedri but he dodges. One comically latches on Forka without managing to hurt him in the least and the knight body slams the bat on the ground (brawling attack), crushing it under him. Meanwhile, Aracyne concentrates his shots on the bats flying too high and kill several. Jedri kills a bat but then he inadvertently throws his flail several yards away and also bends his morningstar (two mishaps in a row)! Grimoire casts Levitate on Forka and the latter smashes another bat midair. A bat bites Forka and this time, pierces the armor. Another one painfully burns Jedri with a fire jet. But before long there’s only two Flaming Bats remaining, still on the ceiling, that seem more interested in perpetuating the species than to fight.
Victorious in this big fight, the adventurers have a look at the passage to the south, a bit further peek at the gate of the dwarven city and call it a day, having numerous wounds and depleted willpower for almost every PCs (and some conditions) and return to their Level 4 base to rest.
Closing Comments:
Escorting the caravan meant increased chance of random encounters but none occured, only a DB ‘s journey mishap.
I did not really convert the steam mephit for DB but it worked fine nonetheless, with the first mephit summoning another and then trying to keep away from the PCs and attack at range.
Forka’s heavy armor is very handy in fights, no doubt about that, but that makes sneaking for the group virtually impossible (they could still split and scout ahead). I like how it balances overall.
The fight with Flaming Bats was finished within 6 rounds, a pretty big fight and really fun I’d say. I made it easier because I ruled that 1d6-1 bats joined the fight each round, so not the whole14 bats of the room all at once. But it was challenging and the PCs had to spend a lot of ressources to win so I think it was good.
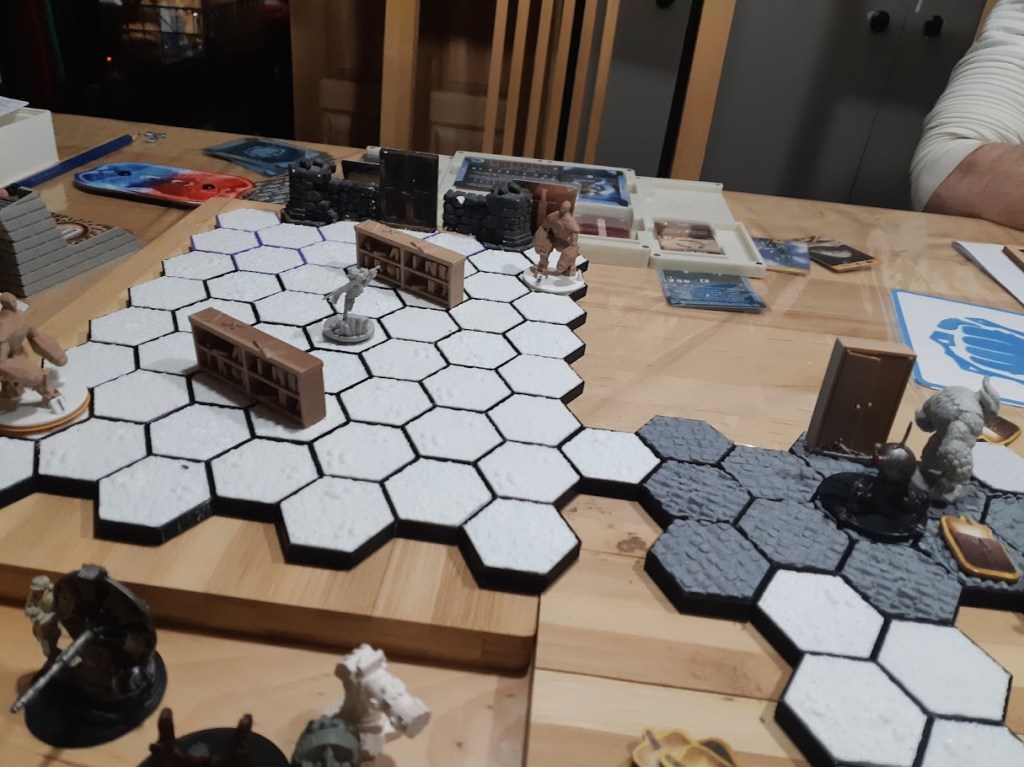
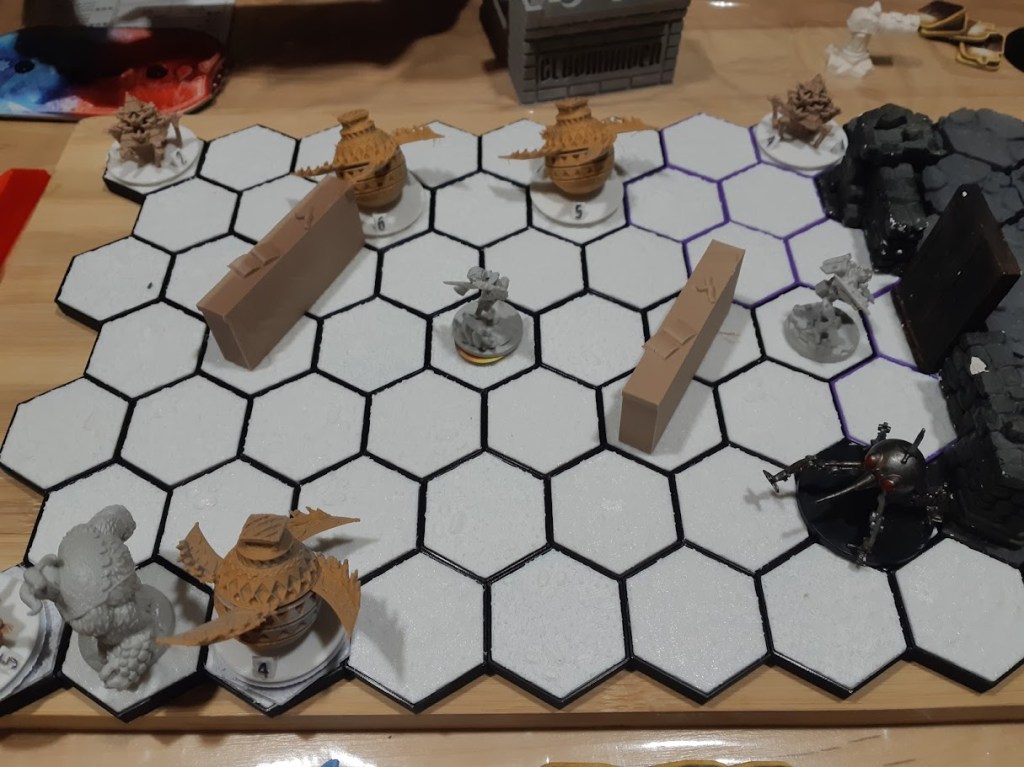
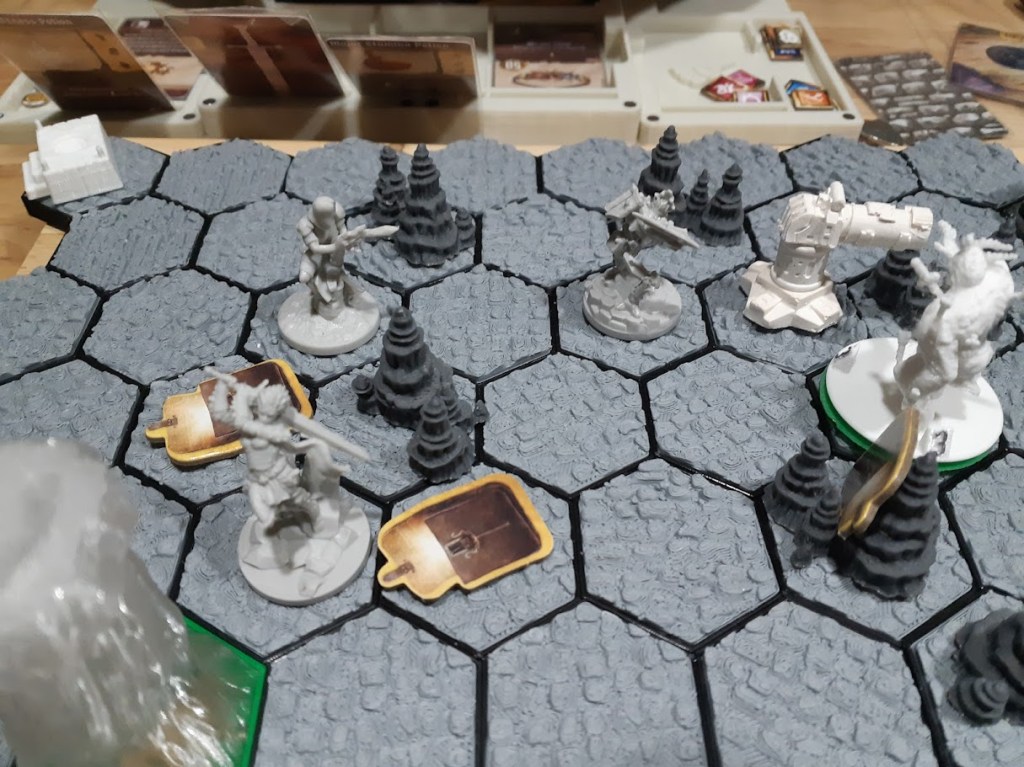
We’re doing a side-scenario, a « job posting » that comes from a Town Hall event if I’m not mistaken. Anyway, as usual we’re doing this only to advance our own goals…
Characters
Cassandra the Diviner (David) lvl 5, forgotten diviner (mercenary pack)
4H2 the Hive (Math) lvl 7, refurbished robotic assembly, ADHD
Teabag the Infuser (Guillaume) lvl 7, no, no, not this kind of teabag or is it?
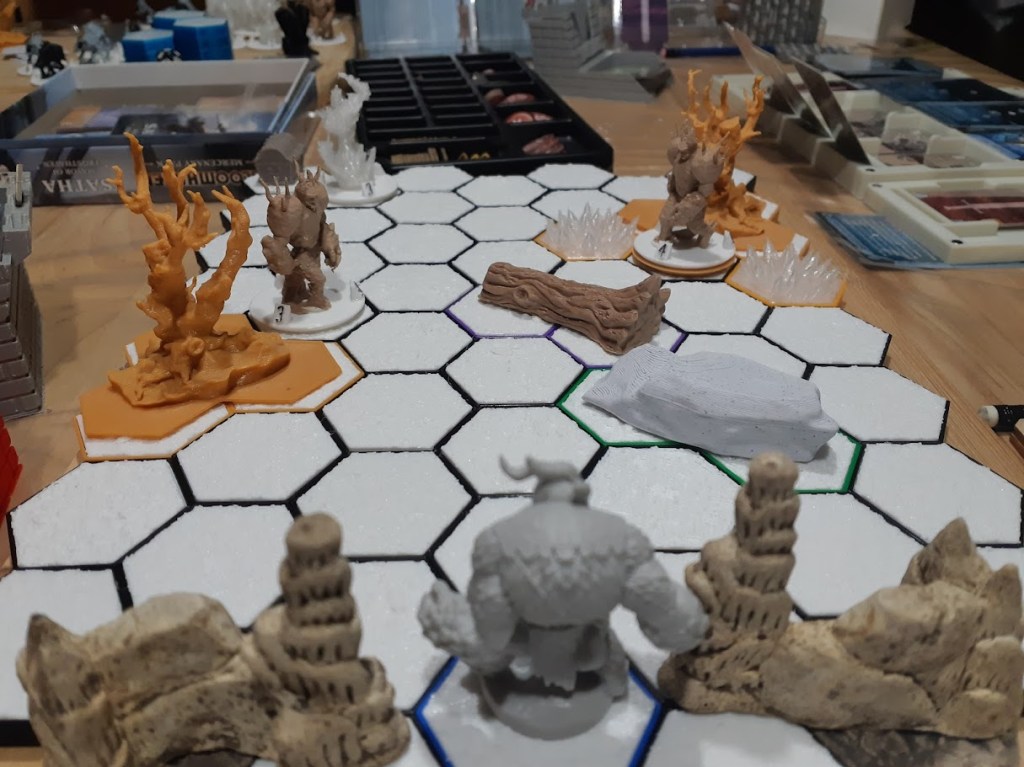
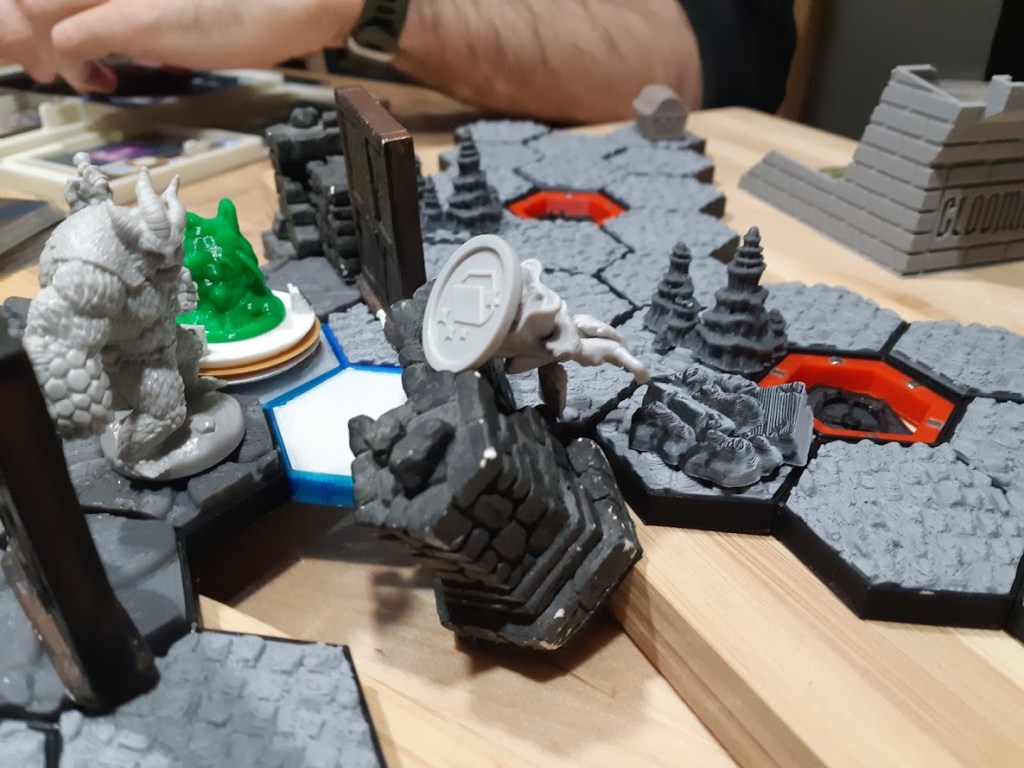
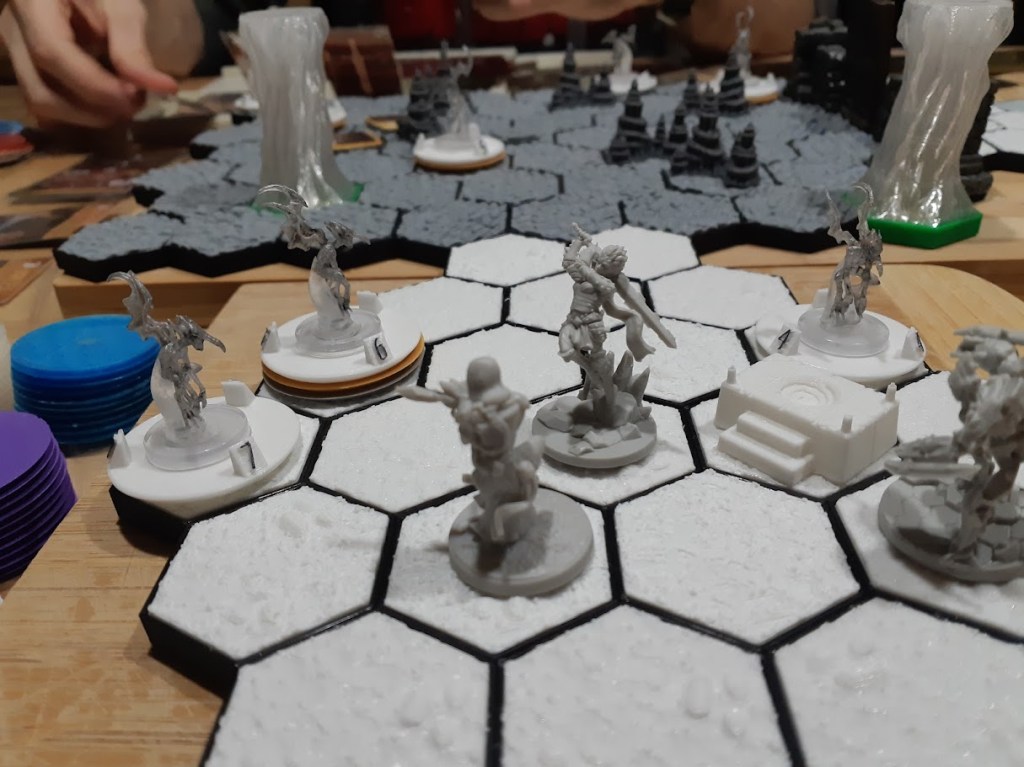
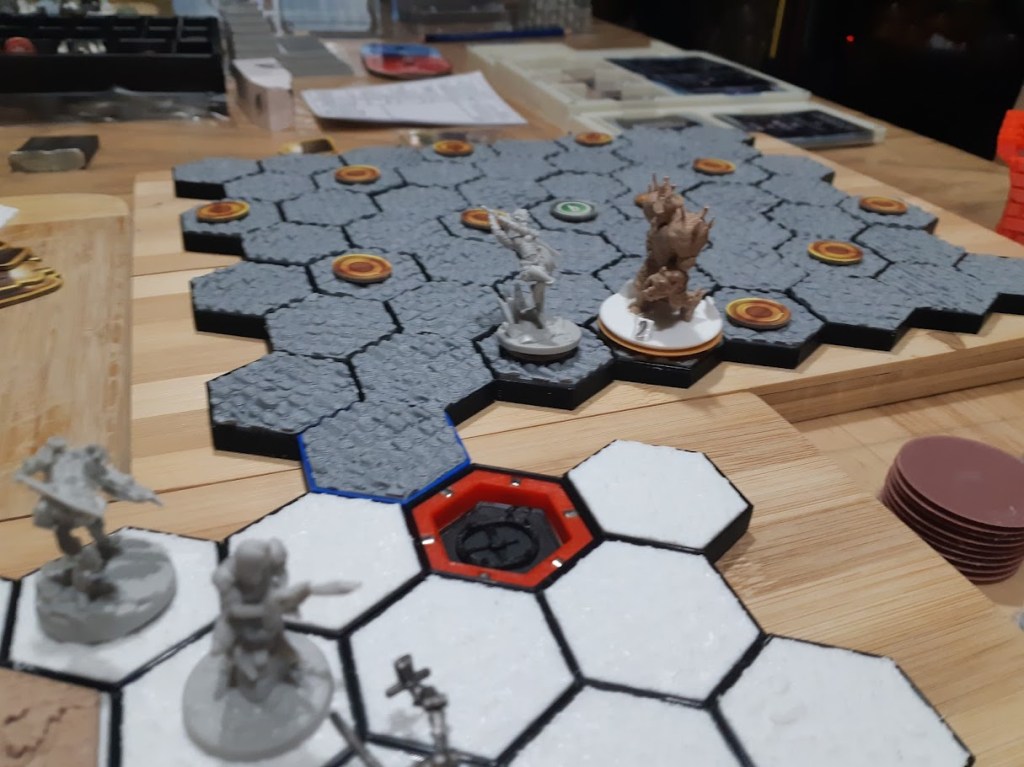
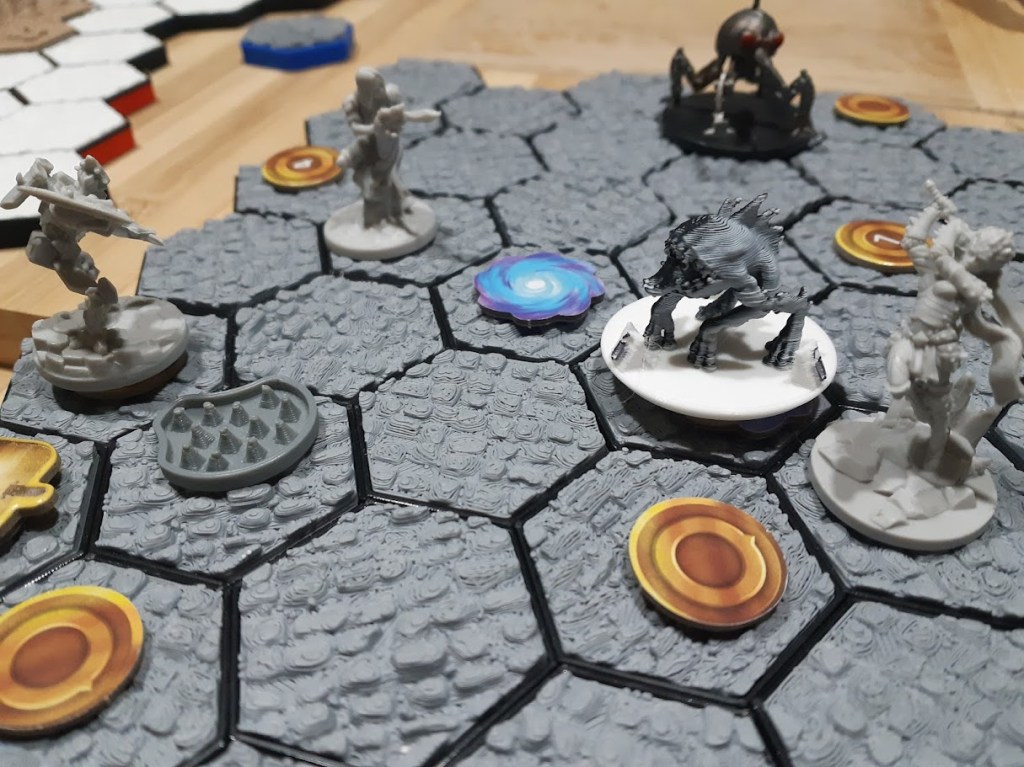
Pretty big map, we have to move our « sled » all the way to the back in order to break an ice wall with it, somehow. Also, one push (forego a top action) of the sled sends it hurling forward, possibly slamming into foes. A gamey mechanic but quite satisfying nonetheless.
Frost Imps, but they seem surprised and are slow to react to our presence. We kill them in no time.But there’s more incoming and dangerous Ice Wraiths with them.The Hive seems in a hurry and jump ahead.While the Infuser and Diviner deal with the last two foes, the Hive opens a new area.Revealing many more monsters, and way behind, our objective.But for now, a tactical retreat despite the Hive’s urge to get it done quickly, we’ll deal with the monsters together.The monsters swarm the Hive’s turret and silence it but it gives us time to deal with them.It’s now safe to proceed further.Bringing the sled with us. « oh sorry, was that your feet Teabag? »And opening the way… Two Polar Bears are irked by this great fracas but we just go our way and leave them behind…
Closing Comments:
Lots of Imps, hard not to get the brittle condition from them and we received great damage from the ice wraiths because of it.
Moving the sled around was somewhat of an hindrance and slowed us down a lot, our hands of cards were pretty thin at the end.
Finished my personal quest of slaying 15 imps, took only 3 scenarios to achieve, that was fast.
Trials continue to add a lot of complexity, Math had to guess how many turns it would take us and was a bit on pressure to press forward accordingly.
The temperature forecast for Québec tomorrow is minus 30 celsius, Frosthaven really doesn’t seem so inhospitable, except for the small matter of monsters maybe…
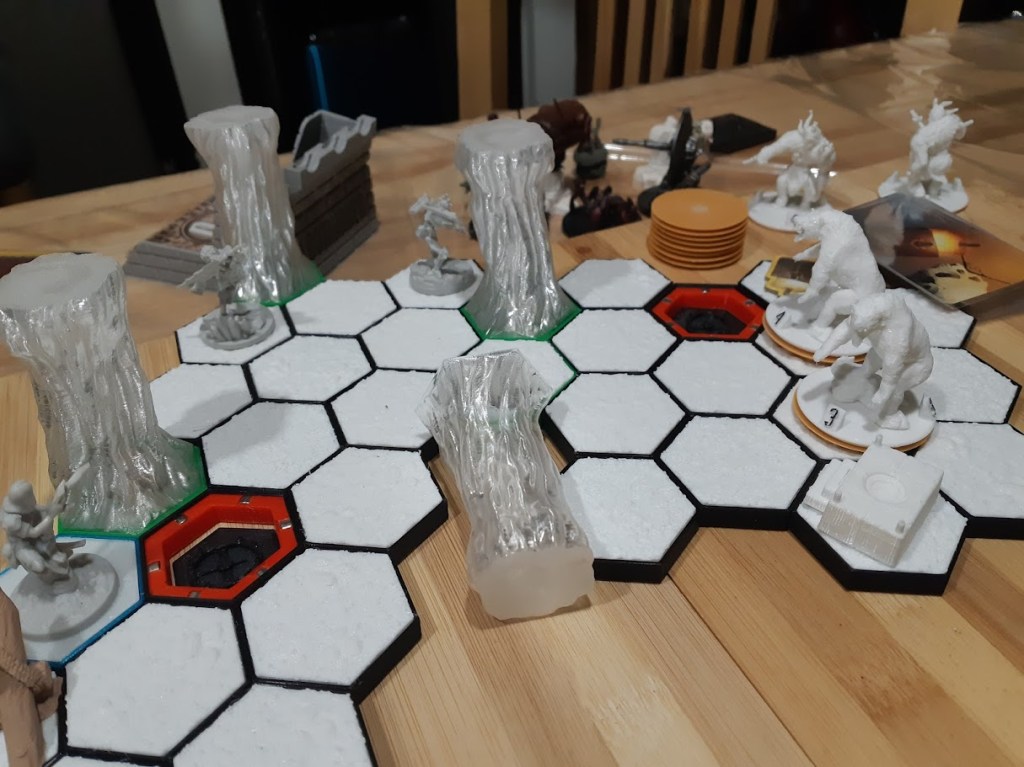
Characters
Cassandra the Diviner (David) lvl 4, forgotten diviner (mercenary pack)
4H2 the Hive (Math) lvl 6, refurbished robotic assembly, ADHD
Teabag the Infuser (Guillaume) lvl 6, no, no, not this kind of teabag or is it?
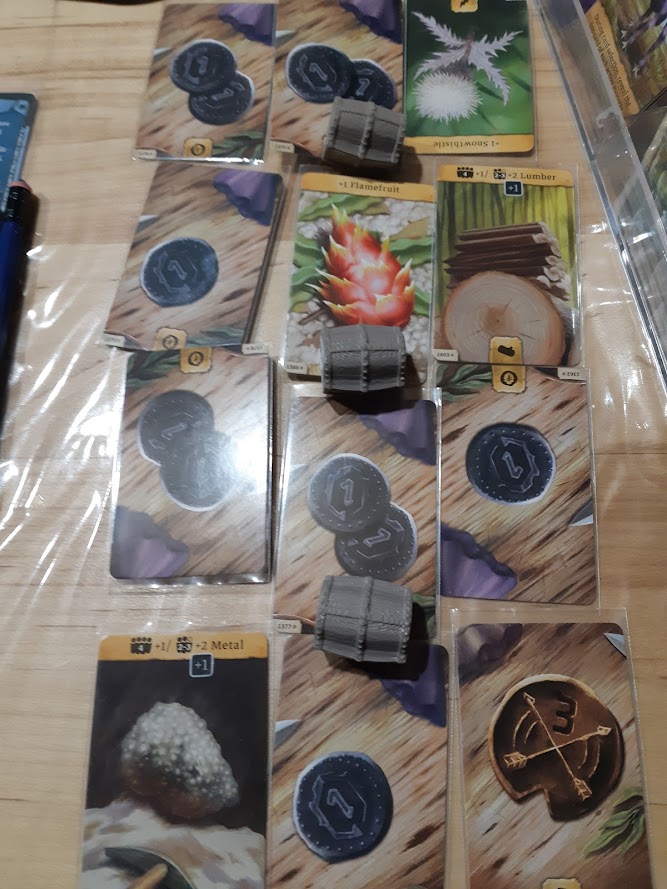
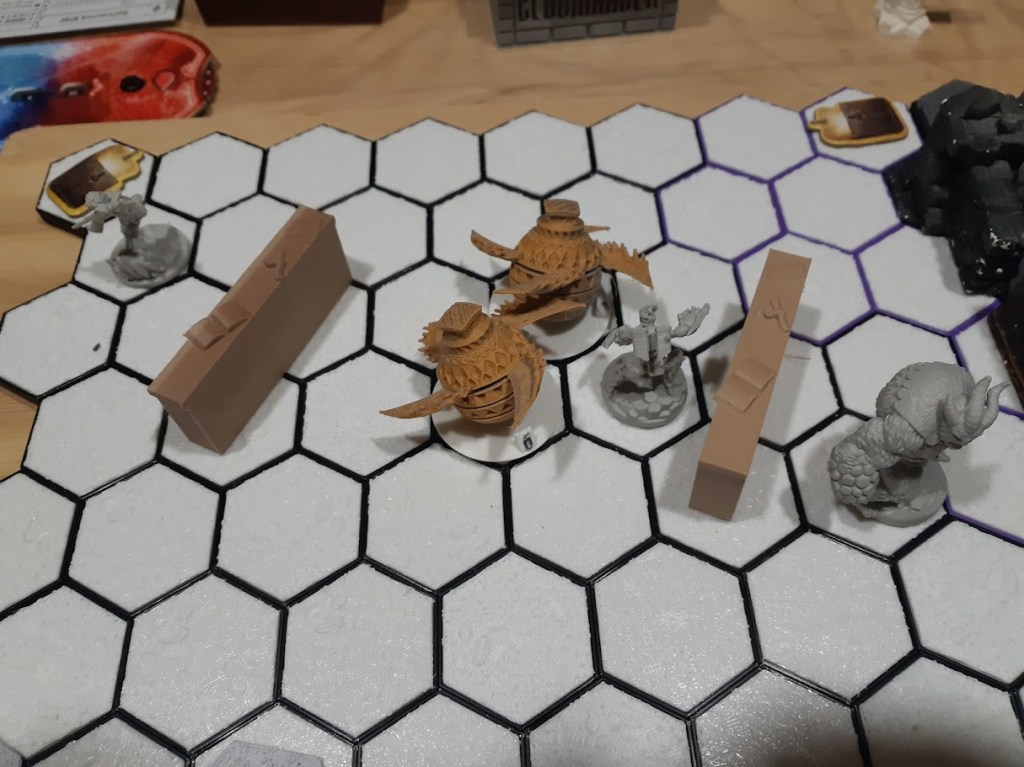
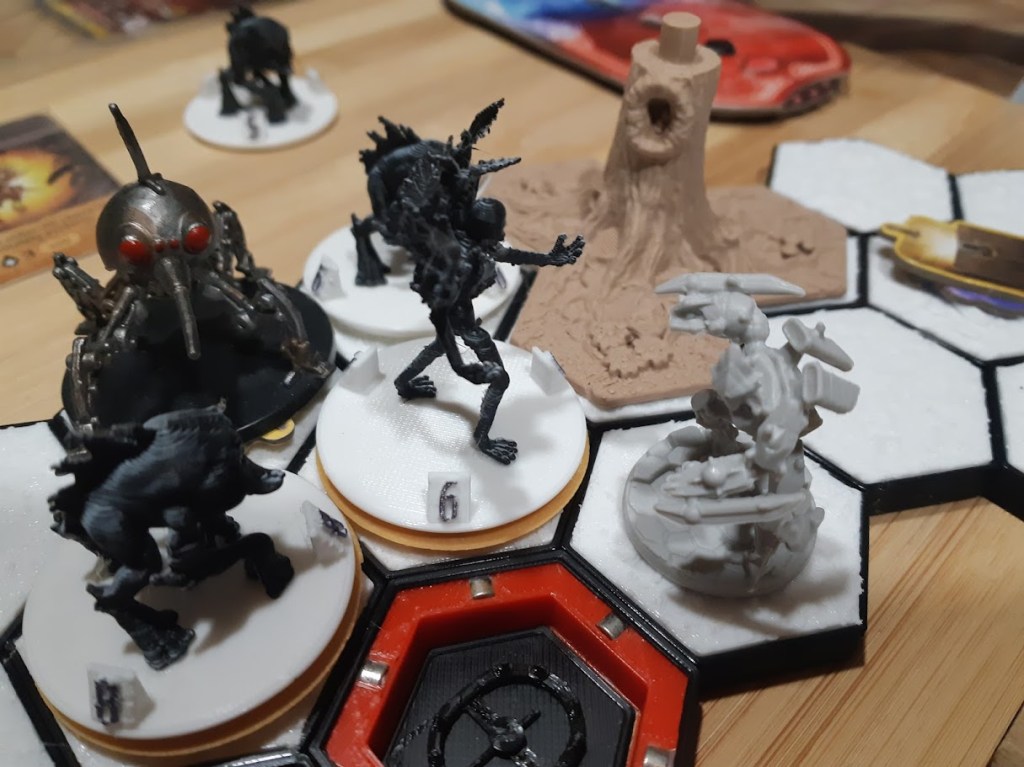
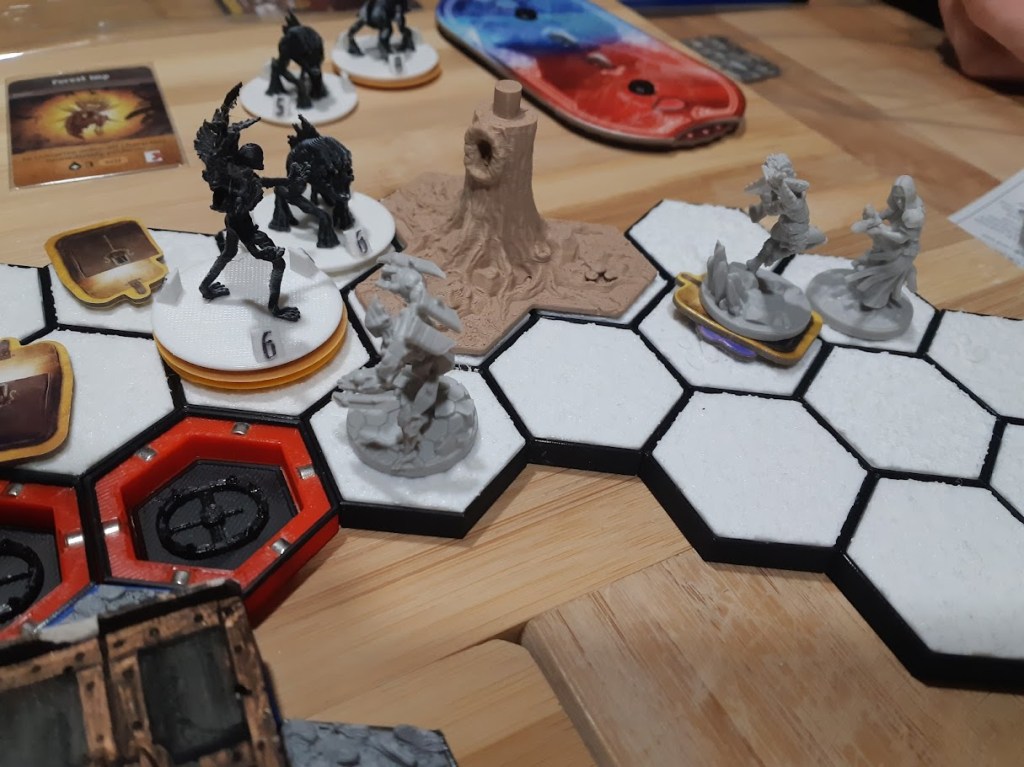
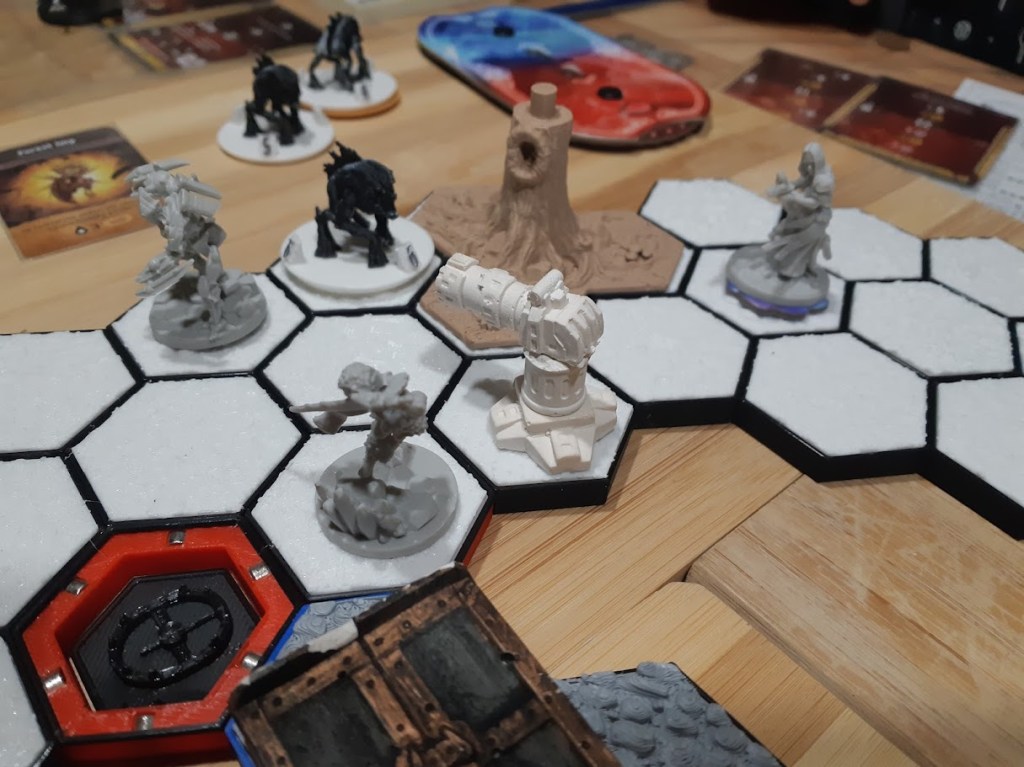
A scenario inside the Radiant Forest, which is described as warm and old-growth, an oasis of life protected from the cold. We’re here to find Radiant Stonesto keep our ballz warm.
Hostile wildlife incoming!The Hive leads the way, helped by his Arcing Generator, but he seems plagued by malfunctions: « I Attack this, NO! Can’t say the word… »Meanwhile, the Infuser seems to be commited to loot everything by himself and have a nervous breakdown when that doesn’t quite happen. Get ahold of yourself guys!Nonetheless, the area is soon cleared of hostiles, time to advance further in the forest.The radiant stones are somewhere in this Fire Swamp.Where are those damn stones? Found two, only one more. Die you annoying imp!
Closing Comments:
This scenario is as much a puzzle than a tactical challenge. But Math, using the superpower of math, efficiently calculated the easiest course to collect the radiant stones (remember that we can move tokens around to make it work) and it went smoothly from there.
Math and Guillaume both had super annoying Trials to accomplish and Math in particular had his character almost die because of it (had to refrain from saying some words in game).
I have to kill imps for my personnal quest and this scenario provided me with an abundant source of them, that was good.
Just a quick shout-out to dripton from DF Whiterock as he consistently offers the best rpg play reports out there on his blog, in a category of his own really. Way better than what I’m doing over here I must say, my dear readers. He includes an impressive level of details for one, and never to the detriment of entertainment – not an easy feat to accomplish when writing play reports.
His present endeavor is a campaign of Dungeon Fantasy (a GURPS variant), he’s indeed a DF guy – within the Halls of Arden Vul mega dungeon (which as a bonus I’m also a big fan of).
So, what can I add? The best play reports ever, precise and humorous. Also, a lot of behind the curtain to be appreciated by dungeon masters or would-be dms.